Author: Kimberly McGuire

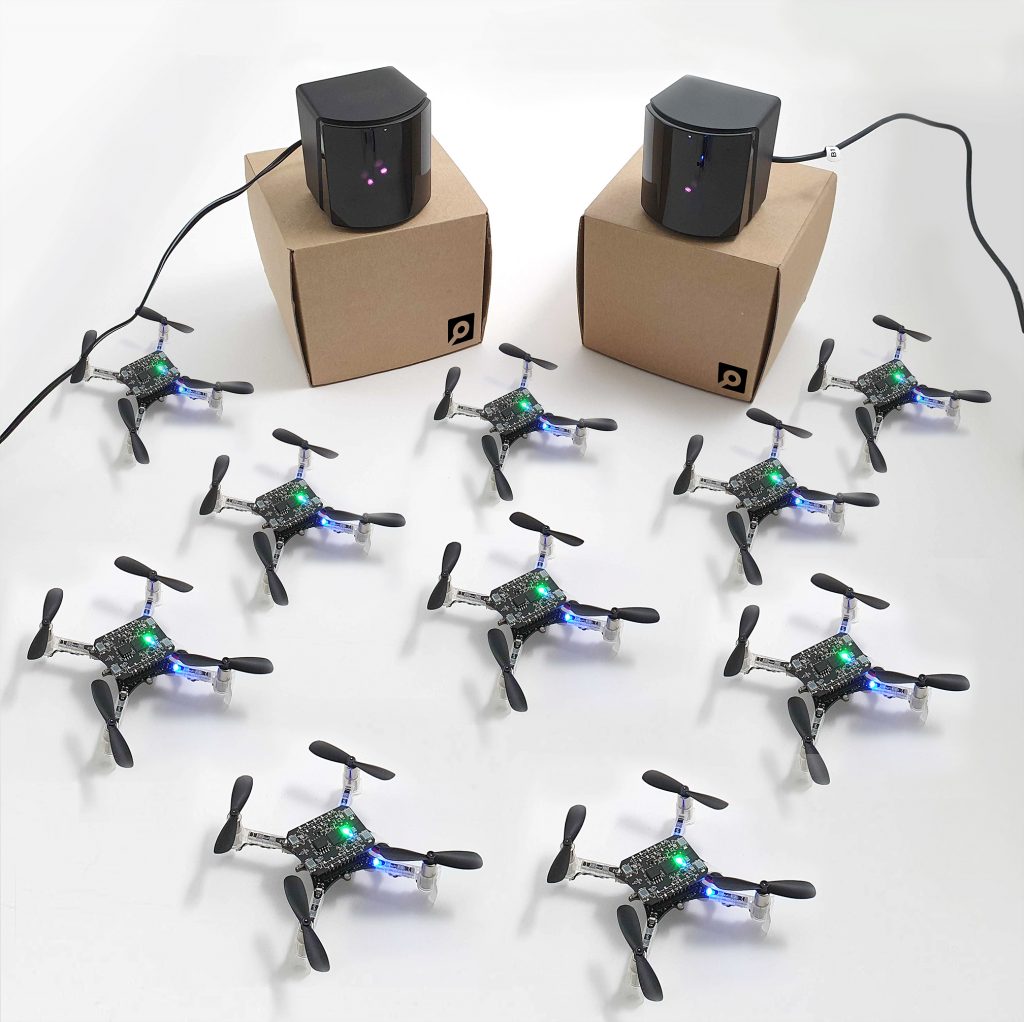
Now that the Lighthouse deck is out of early access and we have made it easier to setup a lighthouse positioning system, we are currently at the next stage: showing how awesome it is! We feel that there are not enough people out there that know about the Lighthouse positioning system and sometimes confuse it even with the Loco position system (to be honest, the abbreviation LPS makes it challenging). But we are confident that the Lighthouse system is a good alternative for those that want to do drone research but are on a tight budget.

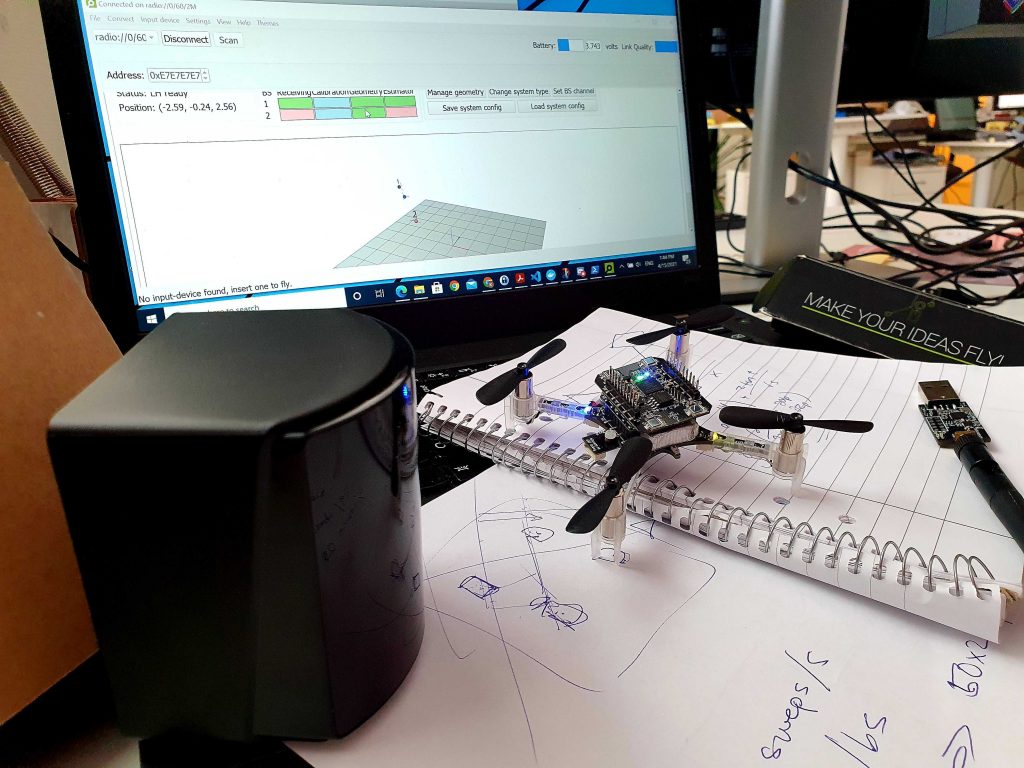
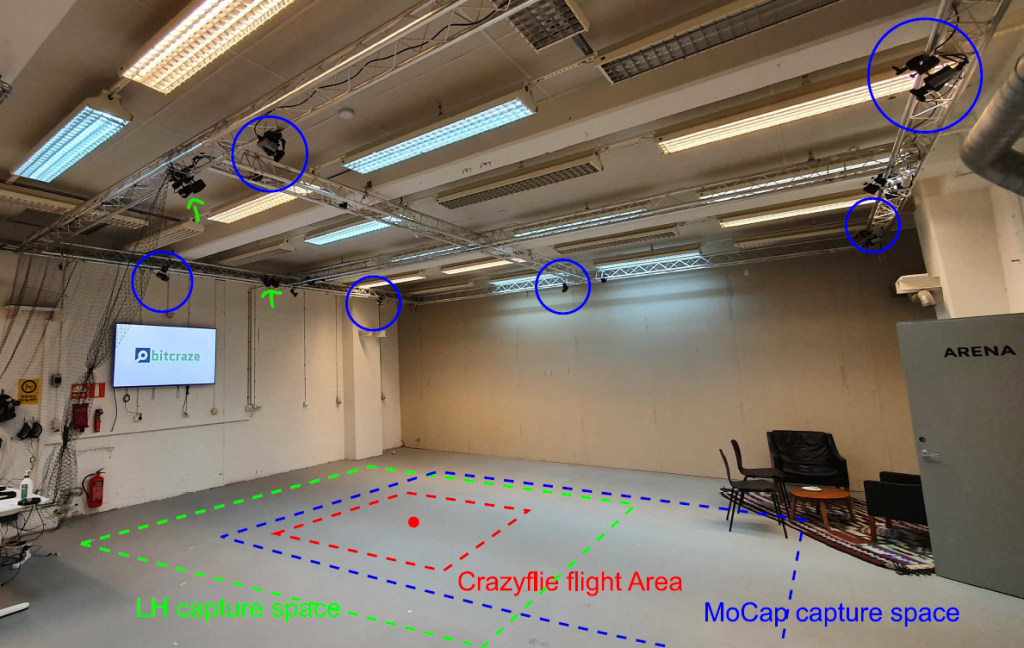
The area of the data collection. from the paper

Lighthouse Dataset

During Wolfgang Hönig‘s time here at Bitcraze, one of the bigger projects we worked together on was to generate a dataset comparing the positioning quality of the Lighthouse system with a Motion Capture (MoCap) system. You could imagine that would be a difficult task, since as the lighthouse basestations transmit infrared light sweeps and MoCap cameras by default also emit IR light which are reflected back by markers. However, with the Active marker deck for the Qualysis system, we were able to use the MoCap and Lighthouse positioning without too much interference.

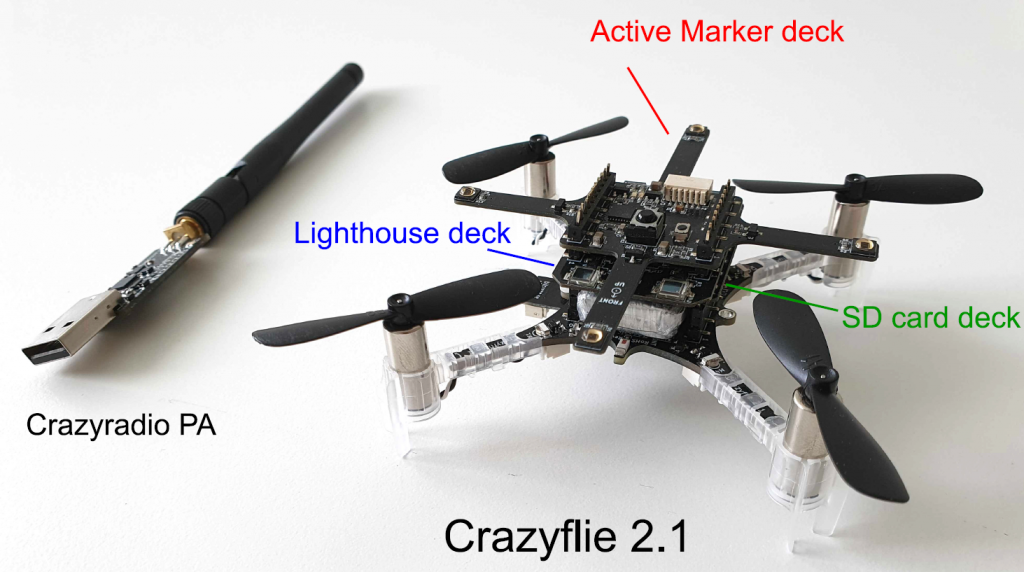
Moreover, Wolfgang also helped out with improving the logging quality on the Micro-SD-card deck which also enabled us to get as much data real-time as possible. He wrote a blogpost about event-based logging a few weeks ago which is a new approach to record data on the Crazyflie at a fast pace. With the Active Marker Deck, the Micro-SD-card deck and of course the Lighthouse deck, … the Crazyflie turn into a full-blown positioning data-collection machine!

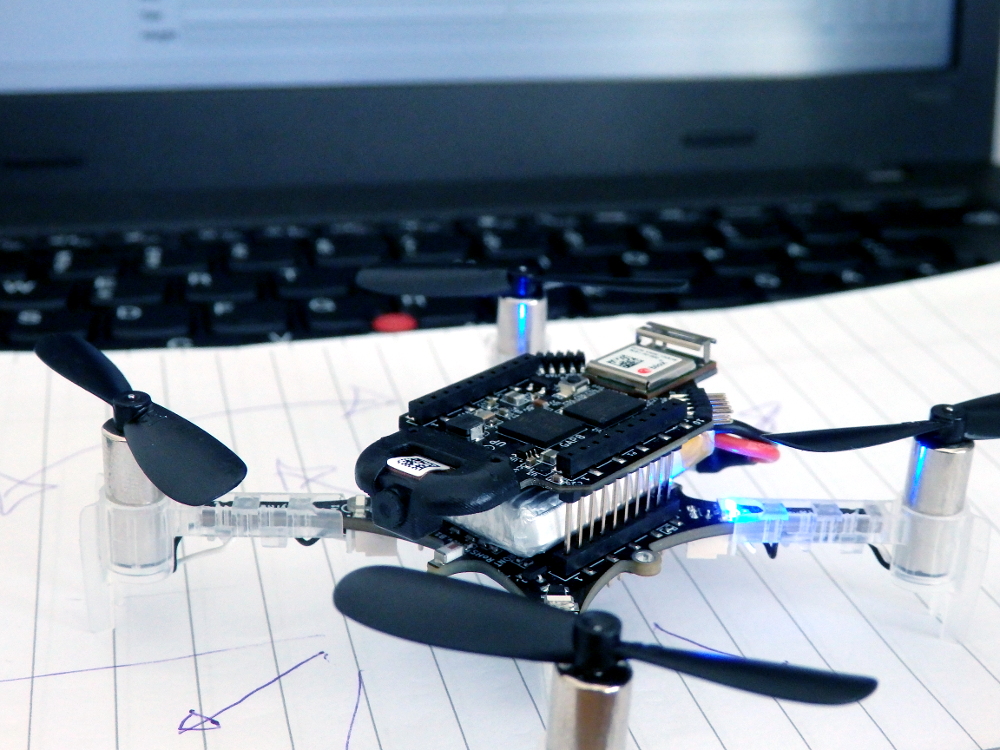
The configuration of the Crazyflie with the Micro-SD-card deck, the Lighthouse-deck from the lighthouse dataset paper

Paper

About this whole process, we wrote the following paper:
Lighthouse Positioning System: Dataset, Accuracy, and Precision for UAV Research,
A.Taffanel, B. Rousselot, J. Danielsson, K. McGuire, K. Richardsson, M. Eliasson, T. Antonsson, W. Hönig, ICRA Workshop on Robot Swarms in the Real World, Arxiv 2021

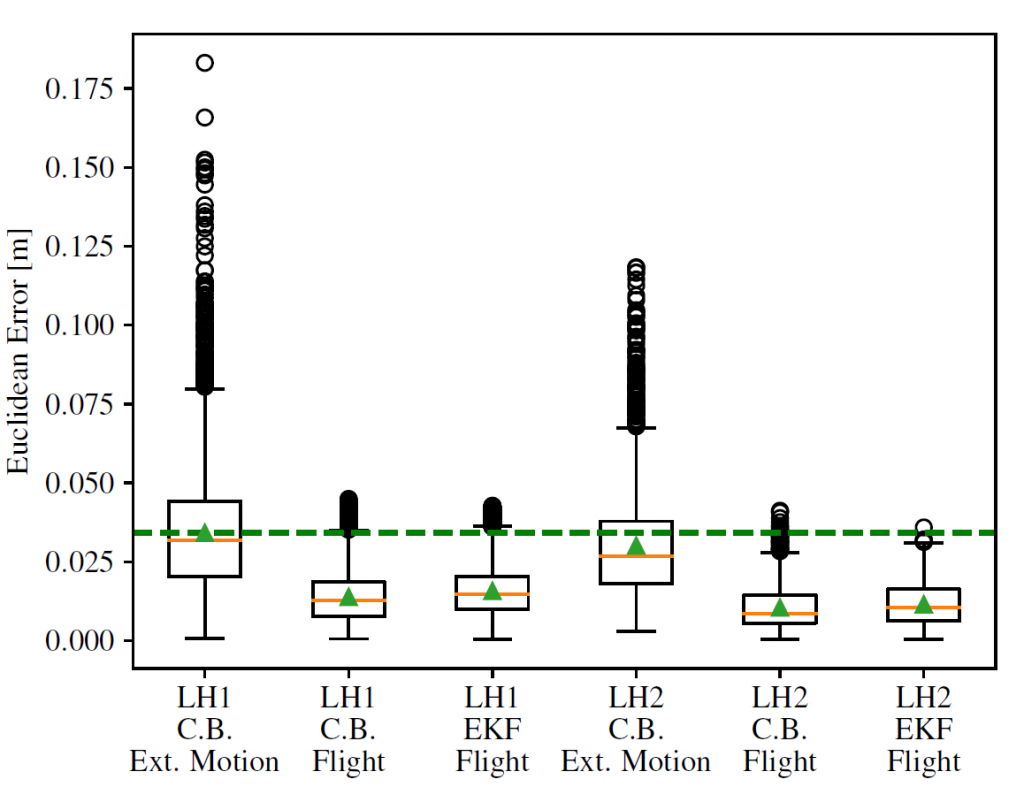
This paper contains an short explanation of the lighthouse system, how we set up the data collection and an analysis of the results, where we compared both Lighthouse V1 and V2 with the Crossing beam (C.B.) method and the extended Kalman filter. In all cases, the mean and median Euclidean error of the Lighthouse positioning system are about 2-4 centimeters compared to our MoCap system as ground truth.

Check out the lighthouse dataset paper to read all the details of the experiments!

The Euclidean Error of both LH1 and LH2 with Mocap as ground-truth taken from the dataset paper.

ICRA Swarm Workshop

Our paper is selected for a poster presentation at the ICRA 2021 Workshop: Robot Swarms in the Real World. So if you have any questions about the paper, please join and ask us in person! The workshop will be held on the 4th of June.

Moreover, we also are sponsoring the event by giving away a Lighthouse Swarm Bundle to whomever wins the best video-demonstration award! So to all the participants, the best of luck! We are super curious to what you’ll have to show us.

Ever since the AI-deck 1.x was released in early access, we’ve been excited to see so many users diving in and experimenting with it. The product is still in early access, where the hardware is deemed ready but the software and documentation still needs work. Even so, we try to do our best to make the product as usable as possible. We’re happy to see some of our users doing great stuff, like the pulp-platforms latest paper “Fully Onboard AI-powered Human-Drone Pose Estimation on Ultra-low Power Autonomous Flying Nano-UAVs“.

Firmware and Examples

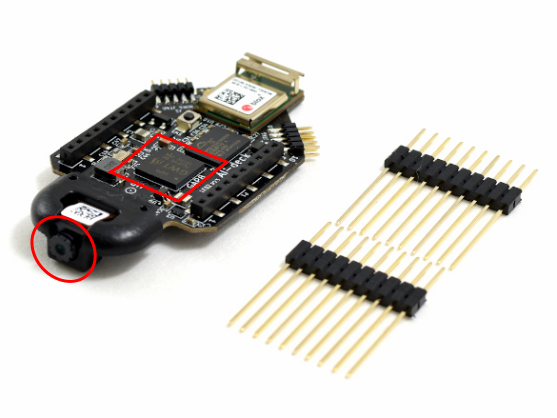
The AI-deck consists of the GAP8 chip developed by Greenwaves Technologies. On their website there’s an explanation of development tools where you get a general understanding of what you can use. Also their GAP SDK documentation explains how to install and try out some of their examples as well, on both a GAP8 simulator on the computer or on the GAP8 chip on the AI-deck itself.

We also host an separate repository for some AIdeck related examples which runs with the GAP SDK.

Documentation and Support

Recently we also added the AIdeck documentation to the Bitcraze website, generated from the docuemtnation already available in the Github repository. There’s still improvements to make, so if you find any issues or any additions needed, don’t hesitate to help us improve it. On the bottom there is an ‘improve this page’ link where you can give the suggested change, or notify us by posting on the issue list of the AIdeck repository.

Also note that we have a separate AI-deck category on our forum where you can search for or add any AI-deck related questions. Remember that posting the issues that you are having will also help us to improve the platform and hopefully soon get it out of Early Access.

Workshop by PULP-platform

On the 16th of April we hosted a workshop given by PULP-platform featuring Greenwaves Technologies. In the workshop the an overview of the AI-deck and GAP8 was given as well as going through some basic hands-on exercises. About 70 people joined the workshop and we were happy it was so well received.

The workshop is a great source of information for anybody who is just getting started with the AI-deck, so have a look at the recordings on Youtube and the slides on the event page. Also make sure to check out their PULP training page for more tools that also can be used on the AI-deck. A big thanks to the PULP-platform and Greenwaves Technologies for taking part in the workshop!


Also we would like to ask if anybody who joined the workshop, to fill in this small questionnaire so that we can get some more feedback on how it went and how we can improve for the next one.

A few weeks ago we released version 2021-03 including the python library, Cfclient and the firmware. The biggest feature of that release was that we (finally) got the lighthouse positioning system out of early access and added it as an official product to the Crazyflie eco system! Of course we are very excited about that milestone, but the work does not end there… We also need to communicate how to use it, features and where to find all this new information to you – our favourite users!

New Landing Page

First of all, we made a new landing page for only the lighthouse system (similar to bitcraze.io/start) we now also have bitcraze.io/lighthouse. This landing page is what will be printed on the Lighthouse base station box that will be available soon in our store, but is also directly accessible from the front page under ‘Product News’.

This landing page has all kinds of handy links which directs the user to the getting started tutorial, the shop page or to its place within the different positioning systems we offer/support. It is meant to give a very generic first overview of the system without being overloaded right off the bat and we hope that the information funnel will be more smooth with this landing page.

New tutorial and product pages

For getting started with the lighthouse positioning system, we heavily advise everybody to follow the new getting started tutorial page, even if you have used the lighthouse system since it’s early access days. The thing is is that the procedure of setting the system up has changed drastically. The calibration data and geometry are now stored in persistent memory on-board the Crazyflie and the lighthouse deck itself is now properly flashed. So if you are still using custom config.mk, hardcode geometry in the app layer or use get_bs_geometry.py to get the geometry… stop what you are doing and update the crazyflie firmware, install the newest Cfclient, and follow the tutorial!

We also already made some product page for the Lighthouse Swarm bundle. Currently it is still noted as coming soon but you can already sign up to get a notification when it is out, which we hope to have ready in about 1-2 month(s). The lighthouse deck was of course already available for those that can not wait and want to buy a SteamVR base station somewhere else. Just keep in mind that, even though the v1 is supported, in the future we will mostly focus on the version 2 of the base stations.

Video tutorial

Once again we have ventured into the land of videos and recorded a “Getting started with the Lighthouse positioning system” tutorial for those who prefer video over text.

Feedback

We love feedback and want to improve! Please don’t hesitate to contact us on contact@bitcraze.io if you have comments or suggestions!

When I was started my Robotics Master back in 2012, I remembered how frustrated I was at the time to setup my development environment in Windows for the C++ beginners course. My memory is a bit fuzzy of course but I remembered it took me days to get all the right drivers, g++ libraries right, and to setup all in the path environmental in Eclipse at the time. Once I started working on Ubuntu for my Master thesis, forced to due to ROS, I was hooked and swore I will never go back to Windows for robotics development again… until now!

I always used Windows on my personal machine on the side for gaming and have a dual-boot on the work computer for some occasional video editing, but especially I had begun to learn game development for Fun Fridays, I started to be drawn to the windows side of the dual boot more and more. But if I needed to try something out on the Crazyflie or needed to debug a problem on the forum, I needed to restart the computer to switch operating systems and that was starting to become a pain! Slowly but steadily I tried out several aspects of the crazyflie ecosystem for development on Windows 10 and actually…. it is not so traumatic as it was almost 10 years ago.

Python Library and Client

It went quite smooth when I first try to install python on windows again. Adding it to the PATH environment variable is still very important but luckily the new install manager provides that as an option. Moreover, Visual Studio Code also provides the possibility to switch between python environments so that you try different versions of python, but for now version 3.8 was plenty for me.

With the newest versions of the Windows install of Python, pip is by definition already installed, but I experienced that it would still be necessary to upgrade pip by typing the following in either a Command Prompt or (my favorite) Powershell:

python -m pip install --upgrade pip

After this, install the cflib from release was quite an ease (‘pip install cflib’) but even installing it from source with Git configured on Windows was no problem at all and very similar to a native Ubuntu install.

Until recently the cfclient was a bit more challenging to install through pip from due the SDL2 windows library had to be downloaded separately, so the only options would have been installing from source or the .exe application release. The later has not been updated since the 2020.09 release due to building errors. Luckily, with the latest release, this has now been fixed as a SLD2 python library was found. Now the cfclient can be installed with a simple ‘pip install cfclient’.

Firmware Building with WSL

The firmware development was the next thing that I tried to get up and running, which managed to be slightly trickier. About a year ago I tried to get Cygwin to work on Windows, but my bad memories of the past came back due to the clunkiness of it all and I abandoned it again. Also there are some reported issues with the out-of-tree build (aka the App layer). Some colleagues at Bitcraze already mentioned the Windows Subsystem for Linux (WSL) but I never really looked at it until the need came to move back to Windows for development. And I must say, I wish I had tried it out a while ago.

With some repositories downloaded already on my Windows system with Git, I installed Ubuntu 20.04 WSL, got the appropriate gcc libraries and accessed the crazyflie-firmware by ‘cd /mnt/c/my/repos‘. Building the firmware with ‘make all’ went pretty okay… although it took about a minute which is a little long compared to the 20 secs on the native Ubuntu install. The big problem was that I could not use Docker and the handy bitcraze toolbelt due to the WSL version still being 1. These functionalities were only available for version 2 so I went ahead and upgraded the WSL and linked it to docker desktop. But after upgrading, building the firmware from that same repository on the C:/ drive took insanely long (almost 10 minutes). So I switched back the WSL ubuntu 20.04 to version 1, installed a second WSL (this time Ubuntu 18.04), updated that one to WSL2 and used solely for docker and toolbelt purposes. Not ideal quite yet… but luckily with visual studio code it is very easy to switch the WSL .

But there is more though! Recently I timed how long it took to build the crazyflie-firmware with ‘make all -j8’ from both WSL version in a repository that is on the C:/ drive on Windows (accessible by /mnt/c from the WLS), or from a repository on the local file system:

  • WSL 2 (ubuntu 18.04)
    • C:/ = 11m06s
    • WSL local = 00m19s
  • WSL 1 (ubuntu 20.04)
    • C:/ = 01m04s
    • WSL local = 00m59s

This is done on an Windows laptop with an i7-6700HQ with 32 Gb RAM. The differences with WLS2 between build firmware on the windows file system or the local WSL file system is huge! So that means that the right way is to have WSL2 with the repo on the WSL file system, which is similar to build time as a native install of Ubuntu.

Flashing the Crazyflie

The main issue still with WSL is that it does not allow USB access… So even if the crazyradio driver is installed on windows with Zadig, you will not be able to see if you type ‘lsusb‘ in WSL for both version 1 and 2. So when I still had the repository on the C:/ drive and build the crazyflie-firmware from there I could flash the Crazyflie through the Cfclient or Cflib (with cfloader) through Powershell, but building it from the local subsystem, which is way faster for WSL2, would require to first copy the cf2.bin file to my C drive before doing that.

Another option, although still in Alpha phase, is to use the experimental Crazyradio server for WSL made by Arnaud, for which the user instructions can be found in an issue thread only for now. The important thing is that the Zadig installed driver has to be switched to WinUSB and switched back again to LibUSB if you want to use the Cfclient on windows. It would still needs some work to improve the user experience but gives promise of better integration of WSL development for the Crazyflie.

To Conclude

Soon I’m planning to soon reinstall the Windows part on the dual boot laptop but there are already some things that I will integrate on my freshly installed Windows based on what I experienced so far:

  • Keep using Python on windows and install the Cfclient and Cflib by pip only.
  • Only use Ubunu 20.04 as WSL2 and install the Crazyflie-firmware on the WSL local file system.
  • Use Visual Studio Code as the editor for both C:/ based and WSL based repos.
  • Use the Crazyradio server or copy the bin file to C:/ whenever I need to flash the crazyflie with development firmware.

For any AIdeck development, I would still need to use the native Ubuntu part or the bitcraze-VM since there is not a USB access or server yet for the programmer. However, if Windows would support USB devices and a graphical interface for WSL, that will make all our Windows-based Crazyflie development dreams come true!
About a month ago we released the AIdeck 1.1, which has some slight upgrades and changes compared to the 1.0. Even though the AIdeck 1.1 is still in early access, we do see the number of support questions increase on our forum and in the issue list of the AIdeck example repo. Therefore we are planning to host an AI-deck getting-started workshop by the PULP lab on the 16th of April at 14:00 (Central European Summer time)!

PULP

The PULP lab has done many amazing research on the field of Edge ML and were one of the collaborators in the development of the AI-deck of which their work on the Pulp Shield was the main inspiration. For more information check out their guest blogpost and be sure to read their latest work on the AI-deck!

More over, they have been working on an opensource tools that also work on the GAP8chip which are must try-outs for any AI-deck users

All in all, since they clearly know what they are talking about, they are more than qualified to teach the rest of us how to work with all this! Also check out Luca Benini’s keynote at RISC-V or this week at the TinyML summit if you would like to learn more about PULP!

Date and content Workshop

The workshop will be tailored to those that have just started to to work with the AI-deck however, we think it will be interesting for regular users as well. Note that the tools mentioned above will not be handled this time.

These are the topics that will be discussed:

  • Hardware explanation (Gap8 specifics and AIdeck)
  • Software Preliminaries (GapSDK,, VM)
  • Hands-on examples

The workshop will take approximately 2 hours and will be on 16th of April in the afternoon, but the exact specifics will be given at a later date. So make sure to already block it in your calendar and to sign up for more information!

Sign up for more information

You can sign up to receive more information by giving your email address in this google form. We will also keep you up-to-date on our discord channel and the event page.

It has been a while since we have done an update on the AI-deck! However, as announced in the New Year post, we do have some important changes coming up for the next batch of production. These changes include updated version of the GAP8 chip and switching to a gray-scale camera. We will call this version the AI-deck 1.1, but its firmware should be compatible with the previous version. Currently we don’t have a clear time-line of when we will receive the next batch but it will be soon.

Newer version of GAP8

Together with our collaborators at Greenwaves technologies, we decided to update the GAP8 chip to the latest version available. Since this required a microchip change on the product and to prevent any confusion, we decided to call this version the AIdeck 1.1.

The new version of the GAP8 chip includes several improvements, which resolves 1. conflict problem between uart and hyperbus and 2. Cluster DMA when doing the data transfer between L2 and L1 Memory. The last issue is considered a corner case will only occur if the AI-deck 1.0 is pushed to its limit with a large deep neural network. Although we expect that both issues will not affect the current users if you are experiencing any related problems with the previous version (AI-deck 1.0), please send us an email to contact@bitcraze.io.

Gray-scale Camera

In July we have given an update where we discussed the color camera and how to process it on the GAP8 chip. Even though at the first we were pretty optimistic on the possibilities with the camera, after discussing with the community, ETH zurich and Greenwaves T., we have decided to switch back to a gray-scale camera.

This is because most examples in the gap_sdk repo mostly assume a gray-scale camera. And even though the color camera would be good for image processing with anything of color, it is less ideal for neural networks on edge machine learning devices.

For those who committed themselves to the color camera module, do not worry! We are planning to still offer the color camera module as a separate product in our store! Also we will have a limited amount of grayscale cameras available for those who are unhappy with their AI-decks 1.0’s color camera.

Firmware, Docs and Examples

Since the AI-deck is still in early release, have all the code and documentation in this github repository. This contains all the start-up guides and keeps track of all the bugs and fixes. Some months ago, we managed to update all of this to the latest GAP SDK (3.8.1), which fixed the streamer issues we are having.

However, the quickest way on how to improve this Early Release product is to get feedback by its users. So if you are having any problems at all, do not hesitate to ask a question on to forum or to open up a issue in the repository!

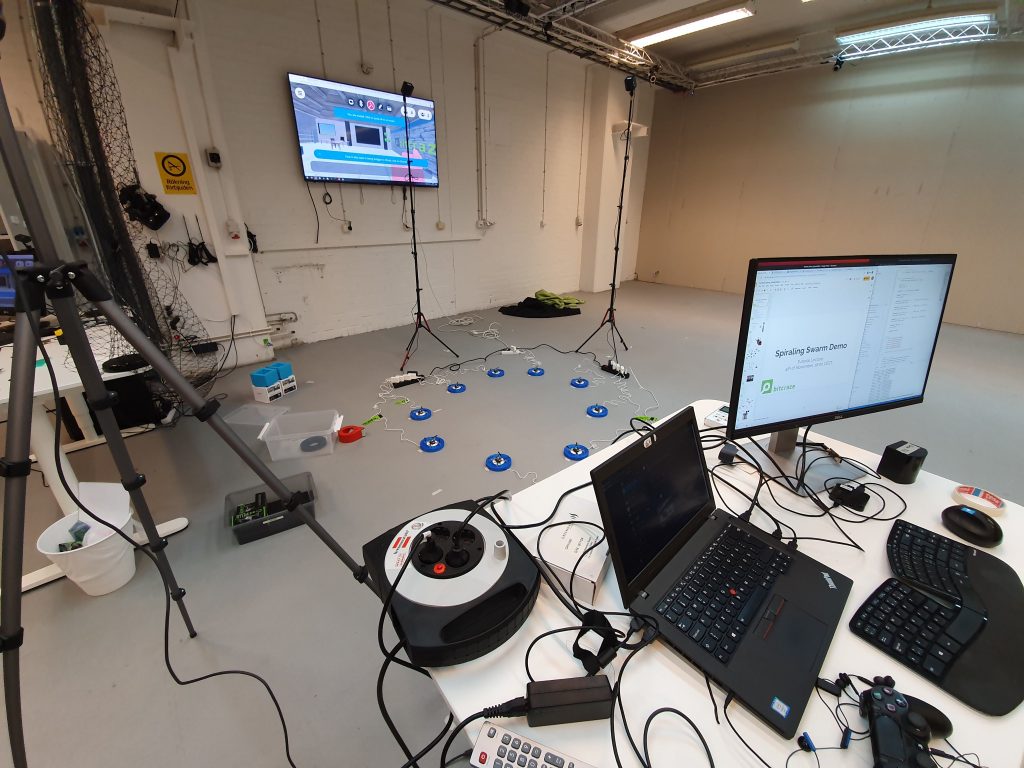
Last Wednesday we had our first live tutorial event, explaining our Spiral Swarm Demo that we usually show at conferences. About 60 people signed up and it seems that we have about 40-50 people that were able to join from all parts of the world. There were even several Crazyflie users from Asia that stayed up late especially for this, so we definitely appreciated the dedication!

For those who missed it, you can find the recordings and slides on this event page.

The Tutorial

The first hour we were mostly talking about the Lighthouse positioning system and in particular focusing on the base station V2. In real time, we had hands-on sessions where we actually showed how we setup the system, how to retrieve the calibration data and how to achieve geometry. The hour ended with showing a Crazyflie flying in the lighthouse system itself.

After the break , we focused on how to achieve more autonomy in the swarm, where we talked about the limitation of communication, the high level commander and the app layer. This was also shown with hands-on with multiple flying Crazyflies and the full automatic demo at the end. We were able to keep showing the demo in the end for a 30 minutes more while we were resting up with a drink :)

We were using Discord and Mozilla Hubs simultaneously to stream the tutorial. Discord worked out nicely since we could have one channel for the stream and one channel for the chat, which one of us was able to look at continuously. Mozilla hubs was a nice add-on however it definitely had some hiccups and streaming quality issues, which is not ideal for following a tutorial. Also being in Virtual Reality for 2 hours is very exhausting we heard from headset-using participants.

What next?

We really liked doing the tutorial and speaking one-on-one with our users very much so we are likely to organize one again. Not sure at what frequency though but of course we will announce it first. We have already some requests for topics so we will look into those first. Next time it probably will be a shorter tutorial on Discord only. Mozilla Hubs might still be used but as a virtual gallery where we put 3D visualizations of what we are working on (like how the base station sweeps work for instance), so that people can get a better understanding. If you have any request for topics please leave a comment below.

We will also try out to use our new Discord Server as a digital ‘watering hole’ for our users. Here everybody will have the opportunity to chat with each-other, to share awesome projects and to maybe help each-other out with certain questions. However, we will not be on Discord ourselves all the time and still advise to use forum.bitcraze.io as the main place to ask questions and to seek for support.

Click here to join our Discord server

During the summer we were discusses at the office of what would be a good substitute of us not being able to go to conferences or fairs anymore (see this blogpost). We sparred with a few ideas, ranging from organizing an online competition to an seminar. Although we initially were quite enthusiastic about organizing the competition, the user questionnaire from the previous blog-post showed us that many of you are rather interested in online tutorials. Based on that we actually started to make some more step-by-step guides, however we definitely would agree that is not the same as meeting each-other face-to-face!

So now we are planning to organize one for real this time! So our first online live tutorial will be on:

Wednesday 4th of November, 18:00 (CET, Malmö Sweden)

Register for the first session here to indicate your interest and to receive up-to-date information. There are of course no cost involved!

First topic: Spiraling Swarm Demo (Live!)

The last couple of years we have been showing our demo at many robotics conferences and fairs, such as ICRA, IMAV and IROS. Since we do not have a opportunity to do that anymore (at least for the foreseeable future), we thought that a suitable first topic of the online tutorial to be about the Spiraling Swarm demo! We will go through the different elements of the demo, which includes the implementation details on the Crazyflie and the Lighthouse Positioning system. We hope to explain all of in about 20-30 minutes and that this would enable you to set the demo up yourself if you want.

We have been thinking about just doing a prerecorded tutorial, however we also really like to talk with our users about their needs and research topics. That is why we think it is important to do it live where we can answer your questions on the go or after the tutorial. This also means that we will be demonstrating the demo live as well! Afterwards we will have a social interaction where we have a friendly chat :)

Mozilla Hubs and Discord

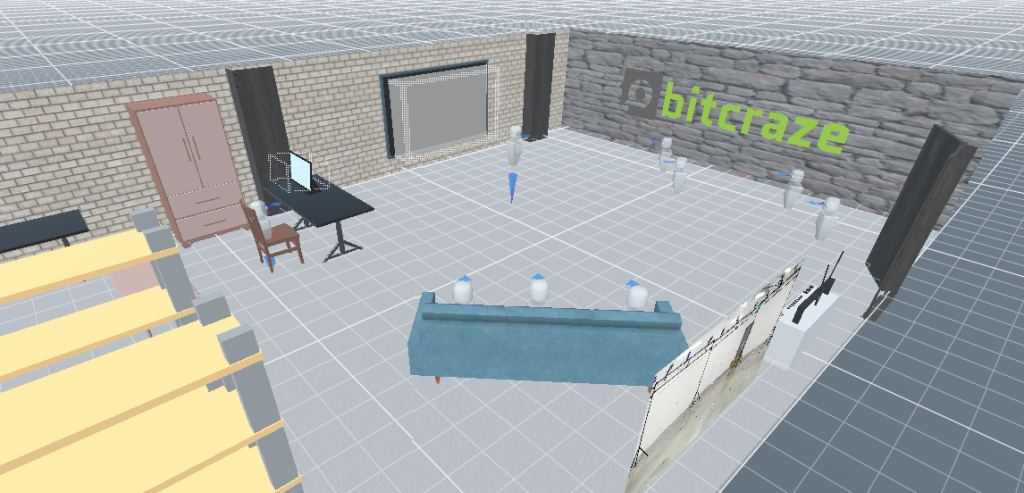
There are so many options on how to exactly host this event, as there are a gazillion alternatives for video conferencing. Currently we have are looking at Mozilla hubs. which fits nicely with our interests in the lighthouse positioning system with the HTC Vive basestations. The nice thing aspect of Hubs is that you don’t need a fancy headset to join, since it is possible to join via your browser or your phone. Me (Kimberly) has joined a Virtual Reality seminar at the beginning of the pandemic, organized by Roland Meertens of pinchofintelligence.com, and it was definitely a very interesting and fun experience. When giving a presentation, it really felt like people were paying attention and were engaged. So, we recently recreated our own flight-lab in VR (using Hub’s environment creator Spoke) and tested it out ourselves. This way you will be able to see our workplace as well!

Of course, we can imagine not everybody is waiting to go full VR. That is why we will combine the online tutorial with Discord, where we will make a video channel where we will stream the live demo and tutorial. It will also be possible to send messages that are visible in both the VR space and the Discord chat channel with Hub’s discord bot. You can choose where to follow the tutorial — fully in VR, or first discord and afterwards socialize in VR — that is totally up to you.

We still need to figure out the specifics, but if you register with your email we will send all the necessary information for the first session to you directly.

IOT conference Malmö

Now something else: tomorrow, namely Tuesday the 5th of October, we will also present at the IOT conference 2020 in Malmö. It is free for participants and it is still possible to register! Come and join if you can not wait to see us until the 4th of November.

Now that we are all back from our summer holiday, we are back on what we were set on doing a while ago already: fixing issues and stabilizing code. In the last two weeks we have been focusing on fixing existing issues of the Flowdeck and LPS positioning system. It is still work in progress and even though we fixed some problems, we still have some way to go! At least we can give you an update of our work of the last few weeks.

Flow-deck Kalman Improvements

When we started working on the motion commander tutorials (see this blogpost), which are mostly based on flying with the flowdeck, we were also hit by the following error that probably many of you know: the Crazyflie flies over a low texture area, wobbles, flips and crashes. This won’t happen as long as you are flying of high texture areas (like a children’s play mat for instance), but the occasional situation that it is not, it should not crash like it does now. The expected behavior of the Crazyflie should be that it glides away until it flies over something with sufficient texture again (That is the behavior that you see if when you are flying manually with a controller, and you just let the controls go). So we decided to investigate this further.

First we thought that it might had something to do with the rotation compensation by the gyroscopes, which is part of the measurement model of the flowdeck, since maybe it was overcompensating or something like that. But if you remove that parts, it starts wobbling right away, even with high texture areas… so that was not it for sure… Even though we still think that it causes the actual wobbling itself (compensating flow that is not detected) but we still had to dig a bit deeper into the issue.

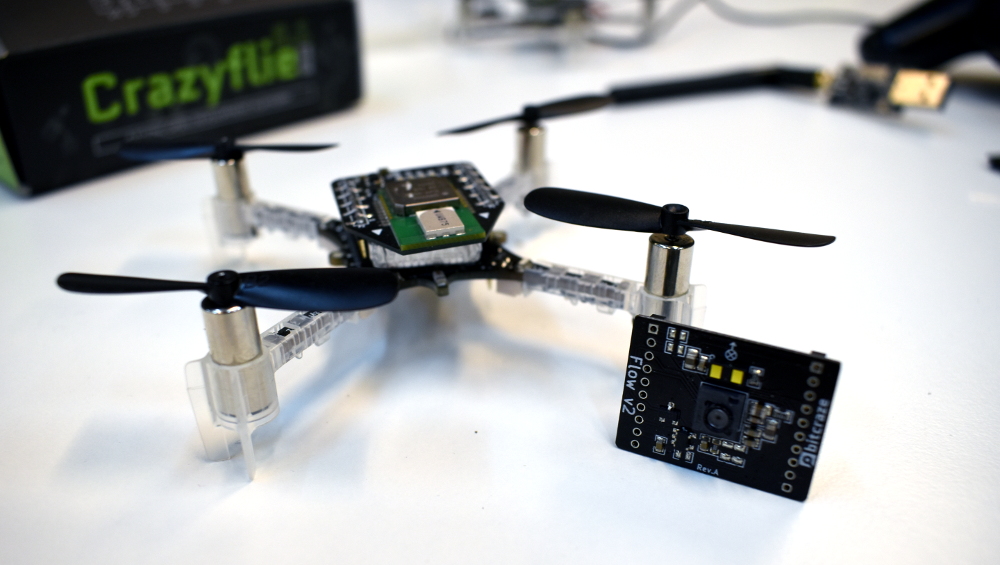
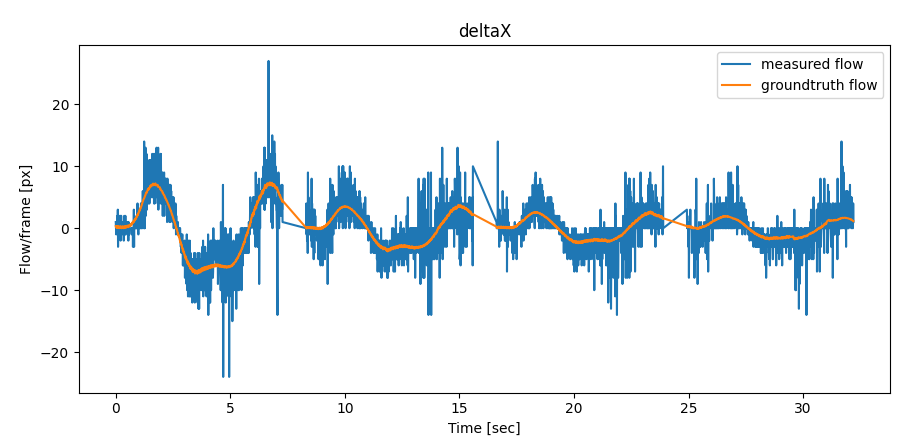
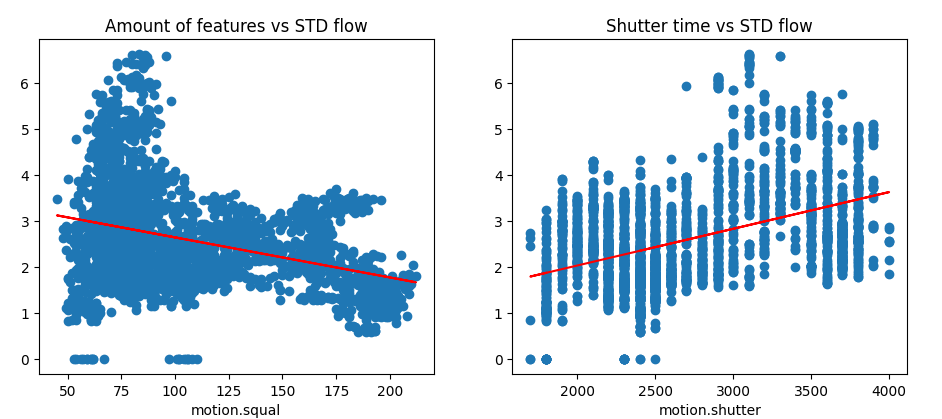
Eventually we did a couple of measurements. We let the Crazyflie fly over a low and high texture area while flying an 8 shape and log a couple of important values. These were the detected flow, the ground truth position, and a couple of quality measurements that the Pixart’s PMW3901 flow sensor provided themselves, namely the amount of features (motion.squal) and the automatic shutter time (motion.shutter). With the ground truth position we can transform that to the ground truth flow that the flowdeck is supposed to measure. With that we can see what the standard deviation of the measurement vs groundtruth flow is supposed to be, and see if we can find a relation the error’s STD and the quality values, which resulted in these couple of nice graphs:

Three major improvements were added to the code based on these results:

  • The standard deviation is the flow measurement is increased from 0.25 to 2.0 pixels, since this is actually a more accurate depiction of the measurement noise to be expected by the Kalman filter
  • An adaptive std based on the motion.shutter has been implemented (since there is a stronger correlation there than with motion.squal), which can activated putting the parameter motion.adaptive to True or 1. Its put by default on False or 0 since the heightened STD of the first improvement already increased the quality of flight significantly.
  • If the flow sensor indicates there is no motion detected (log motion.motion), it will now prevent to send any measurement value to the Kalman filter. Also it will adjust the difference in time (dt) between samples based on the last measurement received.

Now when the Crazyflie flies over low texture areas with the Flowdeck alone, it will not flip anymore but simply glide away! Check out this closed issue to know more about the exact implementation and it should be part of the next release.

The LPS and Flowdeck

Kalman filter conflicts

The previous fix of the flow deck also took care of this issue, which caused the Crazyflie to also flip in the LPS system if it does not detect any flow.. This happened because the Kalman filter trusted the Flow measurement much more than the UWB distance measurement in the previous firmware version, but not anymore! If the Flowdeck is out of range or can’t detect motion, the state estimation will trust the LPS system more. However, once the Flowdeck is detecting motion, it will help out with the accuracy of the positioning estimate.

Moreover, now it is possible to make the Crazyflie fly in and out of the LPS system area with the Flowdeck! however, be sure that it flies using velocity commands, since there are situations where the position estimate can skip:

  • 1- LPS system is off 2- take off Crazyflie with only Flowdeck, 3 – turn on the LPS nodes
  • 1- Take off in LPS, 2- fly out of LPS system’s reach for a while (position estimate will drift a bit) 3- Fly back into the LPS system with position estimation drift due to Flowdeck.

As long as your are flying with velocity commands, like with the assist modes with the controller in the CFclient, this should not be a problem.

Deck compatibility problems

The previous fixes only work with the LPS methods TDOA2 and TDOA3. Unfortunately, there is still some work to be done with the Deck incompatibility with the TWR method and the Flowdeck. The deck stops working quickly after the Crazyflie is turned on and this seems to be related to the SPI bus that is shared by the LPS deck and the flowdeck. Reading the flow sensor takes some time, which blocks the TWR algorithm for a while, making it miss an event. Since the TWR algorithm relies on a continues stream of events from the DWM1000 chip, it simply stops working if it does not … or at least that is our current theory …

Please check out this issue to follow the ongoing discussion. If you have maybe an idea of what is going on, drop a comment and see if we can work together to iron out this issue once and for all!

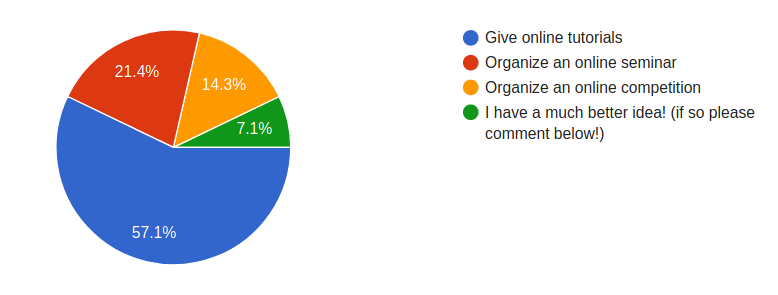
As you probably already know we have been wondering how to best handle our documentation and how to provide information to new Crazyflie starters as easy as possible, as you can read in our blogpost of two weeks ago. In the mean time, we also had a chance to think about the results of a poll we had when we discussed about new ways on how to meet our users. We had about 30 responses, but it became clear that many of you are in the need of getting some more knowledge about working with the Crazyflie. The majority voted for online tutorials, and although it might be difficult to do those during the summer holidays, we already started to make step-by-step guides of various parts of the Crazyflie Eco-system.

Poll result of alternative events.

Python Library Tutorials

Currently we have started with step-by-step tutorials of the CFLIB (the python library of the crazyflie). Usually we refer to the example pages of the CFLIB, however we feel that many users copy paste parts of these scripts for their own purposes, without understanding what is actually going on. Therefore, in order to move Crazyflie beginners to the starting developer phase, we have made these guides in order to teach exactly what is going on in each module, step-by-step.

These tutorials can be found in the python library documentation. The first tutorial focuses on connecting, logging and parameters, which guides you through the process of connecting the Crazyflie through a python script, starting up logging configurations in two ways (asynchronous and synchronous) and how to read and set parameters.

The second tutorial is about the motion commander and is a logical continuation of the first. A nice thing is that we also show how to build in some protection in your script as well. If the Flowdeck is not attached, you can check that and prevent the Crazyflie from taking off altogether if it does not detect the Flowdeck. This will be a life saver in your future endeavors, and trust me I know from experience ;). Afterwards it will go into how to take off – fly forward and go back to the initial position. The application of the end of the motion commander tutorial, is where we also use the logging functionality to get the actual estimated position of the Crazyflie. With this information, we show how to write an application that create a virtual bounding box where the Crazyflie can bounce around in (like the old windows screensaver).

The results of the motion commander step by step guide.

We are planning to finish this step-by-step guide by adding the multi-ranger to the mix, continuing on the bouncing ball example. After that we will probably start some tutorials on how to use the swarming functionality before moving on to the firmware or the client.

Work in Progress

The tutorials are still work in progress. So let us know on the forum, python library github repository or as a comment on this blogpost if you see anything wrong or if something is not very clear. This will improve the quality further so that other users can benefit as well. Also once the these step-by-step tutorials are finished we can start working on video based tutorials as well.

Remember, it is possible to contribute your own fixes (or tutorials) to our repositories if you want to. It’s an open source project after all ;)