Author: Kristoffer Richardsson

There has been much discussion at bitcraze on where to put informations, forum or website. The website is more pretty and more accessible but it can only be updated by us. The wiki can be updated by anyone but it is less accessible and tend to contains much more details. We now solved this debate!

I’m happy to announce that in the spirit of open source and collaborative work, we have published the source code and content for our website on github. It is now possible for anyone to contribute to the website through pull requests on github, so if you want to add, updated or remove something, please go ahead! The code contains all static content, while the blog is still handled by a WordPress instance that lives elsewhere.

github_bitcraze_website

We have tried to make it as easy as possible to work with the code, start a server and see your changes in a browser – check out the “quick start” in the readme.md for details. Most of the content is still in html, but we are aiming at converting as much as possible to markdown over time. We hope that it will make it more accessible and super easy for everyone to work with the site.

Happy updating! And please tell us what you think about this new website.


We have a dashboard (aka radiator) based on dashing in the office.

office2

The purpose of the dashboard is to drive the team focus and encourage us to work on the most important tasks at hand. For instance, we realized that we have been really bad at merging pull requests from the community (sorry about that!), and we wanted to improve. Our solution has been to add a widget to the dashboard that shows all pending pull requests, and now we have been handling pull requests much faster. Success! The visibility of data changed the behavior of the team.

Another problem that has emerged in the new office, is that the 3D printer is now in the basement. We used to have it in the office so monitoring the progress was easy, but now it is two flights of stairs away. We use a Raspberry Pi with the awesome OctoPrint as print server (through the OctoPi image) and since it supports integrated video, we installed a webcam over the printer and viola! Now we can see the progress in OctoPrint.

octoprint

Why not add it to the dashboard? Due to how our network is organised, the dashboard pulls in the data from the printer on client side as opposed to server side, but problem solved. The code is on github.

dashboard

46 minutes left on the 3D-print. No pull requests to handle!

On Thursday 2015-11-12 our web-servers were down for a few hours. Some unexpected updates in our hosing service made our storage solution stop. Unfortunately we had to restore our data from the latest backups to get the system back up and therefore lost all “new” data between 2:00 and 16:00 CET 2015-11-12. The services that were affected are the forum, the blog and the wiki. Any posts, new accounts or other user data that has been added during that period were lost. If your post/account/comment is lost, please add it again.

We are sorry about this and are working on finding a solution to avoid this in the future.

We are experimenting with pomodoro inspired techniques (http://pomodorotechnique.com/) in the team. What we do is that we are doing team pomodoros where we work focused for 25 minutes, without communicating. During the work periods we record all questions and so on that we need to ask, and after the period we communicate and resolve all issues that came up. We don’t do pomodoros all the time, but only when we feel that it is useful. Some days we might do a lot of them and other days none.

What we find interesting is that it has turned out that the important feature is not about NOT communicating during the work periods, but that the communication becomes more focused when we do communicate.

We have added a countdown timer widget to our dashboard to make it really easy to start by anyone.

pomodoro2 pomodoro
The timer is also handy for all sort of time-boxed activities in the team.

The code for the widget is available at https://gist.github.com/krichardsson/a2c8ad556caa643f822c

There are a lot of things we need to keep track of in Bitcraze, such as customer support, production, book keeping, planing for the future, improving how we work, our servers, forum, the community, source code, new hardware, just to mention a few areas. There has been an informal distribution of these areas between the persons in the company, but it has not been very clear who is responsible. This has led to that we all worry about everything but we still miss to catch some issues. So we have two bad properties: not as good performance as we would like to have and negative feelings. So what to do?

We have decided to set up role contracts. Our version of role contracts is simply to appoint one person to each area that we feel needs continuous attention. The person that is responsible for an area is expected to keep track of what happens to that area, think about how we should improve or change, and notify us (the rest of the team) when we need to take some sort of action. That person is not expected to execute or implement, but make sure that we get it done as a team.

We will update the role contracts at regular intervalls, every month as a start, to make sure we are working with stuff we passionate about and so that we have a dynamic team.

Last Thursday we went to LTH (University of Lund), to the Robotics department, to make some measurements on the ultra wide band (UWB) positioning system we are working on. The idea was to use one of their robots to move a Crazyflie around along well known path, and at the same time record as much sensor data as possible. This would give us data that we can crunch offline.

We placed four anchors around the robot and our positioning expansion deck on the Crazyflie. The Crazyflie collected the data from the positioning deck as well as its internal sensors and streamed the data it over USB to an external computer for storage. We collected the following data:

  • Distance to the anchors (raw measurements)
  • Air pressure at the anchors
  • Air pressure at the Crazyflie
  • Accelerometers
  • Gyros

The logs from the robot will give us the real position of the Crazyflie as well as the anchors, and from that we will be able to evaluate the performance of algorithms that use the sensors to figure out the position.

The dataset will be shared with the researchers at Lunds university, they have some interesting ideas they want to try out.

Next step is to crunch the data…

For more information on our UWB positioning project, see Firmware and dwm 1000 nodes

For a background on the “How we work” category, see Self organizing

Next on the agenda was to talk about feedback. Feedback is the oil that keeps the team happy and enable individuals to gain insights about them selfs. Important stuff!

We talked about the self and some techniques/models that can be used to understand our selfs and others (e. g. Johari Window). We discussed how we react when we receive feedback, and what we can do to increase the possibilities that we really listen to and understand the feedback that is given to us. These insights also help us to give feedback to other persons.

The last part of this was a “recipe” of how to compose feedback for someone. Try to include the following

  • Observation of a behaviour
  • How that makes you feel
  • Your needs that created the feeling
  • Your wished of alternative behaviour

Some slides are available at Prezi

Finally we practiced by giving everyone else feedback one-on-one. We will continue to give each other feedback over the coming weeks on a regular basis – practice makes perfect.

Marcus and Arnaud have packed up and left the Berlin Maker Faire after two hectic days. and last weekend Tobias and I were at Maker Fair New York. It’s a lot of fun showing the Crazyflie, meeting people and getting feedback from the community!

MF15NY_Badge1icon_Berlin

This time we had created a demo where we used a webcam to track the position of the Crazyflie (see older blog post). I really like the demo, it’s pretty minimalistic and shows the awesome capabilities of the Crazyflie as a platform that enables the user to explore and develop on top of it. Just add a webcam, AR-tag some control algorithms, imagination and engineering and you have an autonomously flying Crazyflie!

When Tobias and I arrived at the New York Maker Faire on Friday afternoon to set up the demo, we discovered that our booth was not indoors, but under a roof without walls. And it was windy!

mfny-tent mfny

There was no way the control algorithms could manage to keep the Crazyflie at its taget position, so what to do? We tried various ways of tethering it with a string while still flying, but without any success. We had to resort to hanging the copter in a string, but not really flying it. To at least get some use of the positioning system, we used the position of the hanging copter to change the color and intensity of LED-rings on four other copters that we put in the corners of the test rig. Not what we hoped for but what do you do?

My favourite gadget at the New York fare was the Pancake Bot – a must in every home!

pancakebot

The Berlin Maker Faire was organized for the first time last weekend. The venue was a bit smaller than other Maker Faires we’ve been to, but there was lots of interesting visitors and it was held in a very nice old railway-postal building. Fred from our community joined us during the fair and gave us some much needed support in the booth. As for the demo it was working better, but we still had some issues with lighting and the detection of the AR-tag. Room for improvement.

IMG_20151003_111805_small

The fair had a drone area, but unfortunately not a lot of drones. We were flying the Crazyflie 2.0 as well as a bigger quad using the Big Quad deck. Aside from that Fred brought a long his even bigger quad that uses the Open Pilot CC 3D.

IMG_20151003_140430_small


IMG_20151003_140908_small

Big thanks to Fred for showing us Berlin and helping us out!


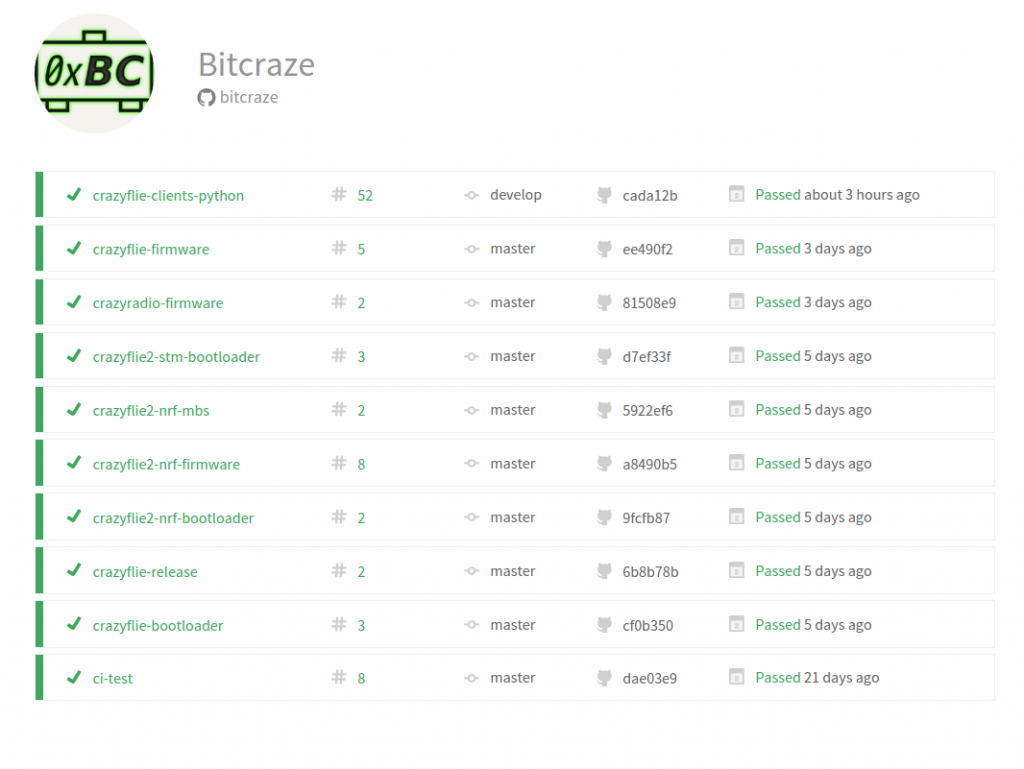
We have decided to use Travis for continuous integration builds of our open source repositories. Travis is automatically building the code on all branches and pull requests, which gives all developers that wants to contribute to the project, the possibility to see that their code passes the build. The current status of the latest build on the main branch, is visible through the icon in the readme in github, or on the Bitcraze page at travis.

travis-ci

The projects we have added so far to travis are written in C or python. The C projects for instance, must be compiled with special compilers for the processors used in the crazyflie which adds some extra complexity. We have created a docker image (bitcraze/builder) with the tools needed, to make life easier for developers. If you use the image when developing, there is no need to install tools locally, and the same image is used in travis builds, so you know you will get the same results as the CI-server. This also removes the problem of tools with different versions (and results) in the development- and build environment.

To use the image you can for instance type

docker run --rm -v ${PWD}:/module bitcraze/builder make

Event though it is awesome to be able to create a well known build environment through a docker container, we feel that too much typing is needed to execute a simple make.  To solve that problem we are looking at the possibility of creating a toolbelt that will handle that for you. More information on that later on, for now developers will have to find their own solutions through scripting, aliasing or other means.

Obviously you need Docker to use this image. If you have not tried it out yet, take a look at www.docker.com.

We are aiming for automated testing of our code, and even though we have a lot of work to do, we have taken the first baby step. For the moment, firmware projects are simply compiled and linked to ensure that the code is coherent. Projects that support both crazyflie 1 and 2 are built in both flavours to avoid problems for developers that might only use one of the platforms.  The python client project is only checked for PEP8 compliance, but we are looking at how to unit test. Any input from the community is welcome!

Happy hacking!