Author: Marcus

We are still mostly on vacation but we are continuing the development but not as actively. Like we wrote last time we compiled a list of tasks that has to be finished in order for us to release the project so that’s what we are working on :-D

Apart from that we are also working on some mandatory IT-stuff, like deciding what forum/SCM/VPS provider to use etc.

We haven’t seen any more problems with the prototypes since we exchanged the MPU-6050. All of the changes for the new prototype has now been tested and we are currently modifying the board design to fix the bugs that we have found. Then it’s time to order a new batch of prototypes. Our hope is that this will be our last round and that the next order will be a bit bigger!

The last couple of months we have re-designed large parts of the code to be more modular and easier to maintain and at the same time we have added more features such as rate controlled PID and flexible logging and parameter system. The UI has been slightly re-designed and the PyQwt dependency has been removed.

During the summertime we are a bit split up since we are going on vacation and are actually trying to go outside! So we have tried to define the features and tasks that are left until the first release of the project so we can focus our efforts on the right things.

We feel that we have never been this close to the release so we are really looking forward to this autumn :-D


We replaced the broken MPU-6050 with the replacements we got and Crazyflie is now flying again! Until now we did not really know if the new architecture with digital sensors was working and able to fly. Now we know it can, and the performance of the copter seems really very good!

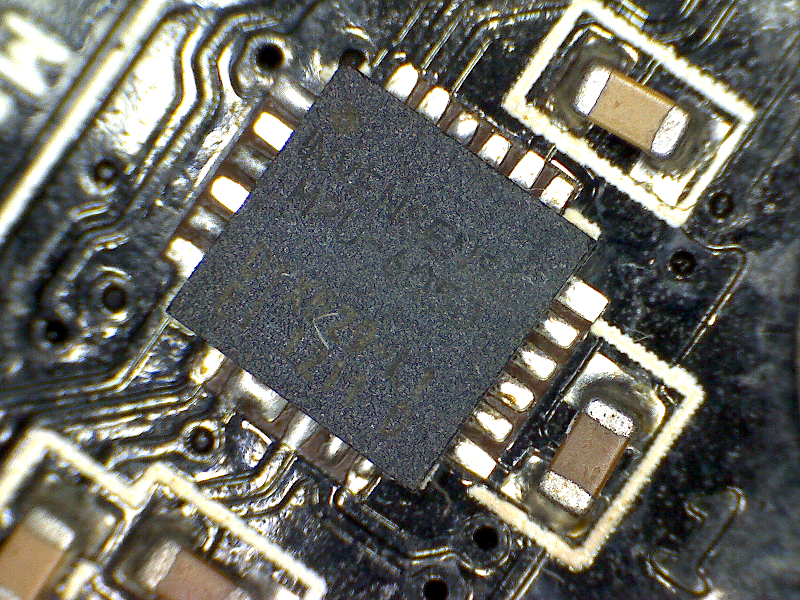
Replacing QFN components are not that easy if you don’t have access to good tools. Luckily they have a hot air station at work which makes the job a lot easier. We took a photo of the replaced MPU-6050 and it is actually hard to distinguish between the original re-flow soldered one, except maybe for the crocked capacitors. Ohh and what looks as a short on two of the pins are supposed to be there ;-)


We think the stability is a bit better than with the IDG500/ISZ500 gyros. Judge for your self ;-)

After the problem discovered last week we have patched a couple of copter and we are now getting values from the sensors. Our biggest problem for the moment is a huge offset that we get from the MPU-6050 (both from the accelerometer and the gyro). It’s not the self-test mode since we have tried enabling/disabling but we are still investigating…

Except for that the software is going forward both on the copter and for the PC GUI. We are implementing parameters and log systems that will greatly ease future development and debugging on the system: it will basically be possible to log and observe dynamically any internal variable and to set settings, like the regulation settings, in real time from the PC GUI.

We have found a few workarounds for the JTAG reset problem but finally none of them are needed since we unfortunately have to make a new revision anyway and thus we can properly fix the probem. After spending hours debugging the PWM for the motors we finally opened up the errata and found a serious problem with our new version. Like we mentioned before we moved the PWM for two of the motors so we could have one dedicated SPI for the expansion header and not shared with the radio. This was done by moving one of the motors to PB5 (alternative function TIM3_CH2) while also switching to new sensors that use I2C. According to the errata it’s not possible to clock I2C1 (where the MPU6050 is connected) and TIM3 while using TIM3_CH2 remapped and as output (to drive the PWM for the motor).

On a happier note we did some range-testing of the radio since we have now changed to 0402 components in the radio filter on the USB radio dongle and the quadcopter. The measurements shows that we get up to ~65 meters before we start loosing packets and up to ~80 meters before we loose communication completely. The test was done outside and using the 250Kbps mode.

We have noticed some confusion about how we control the Crazyflie after our RC controller post. So just to clarify we are using a Playstation 3 gamepad to control the Crazyflie from the PC, this is the best we have but any gamepad or joystick would do. However there are other options.

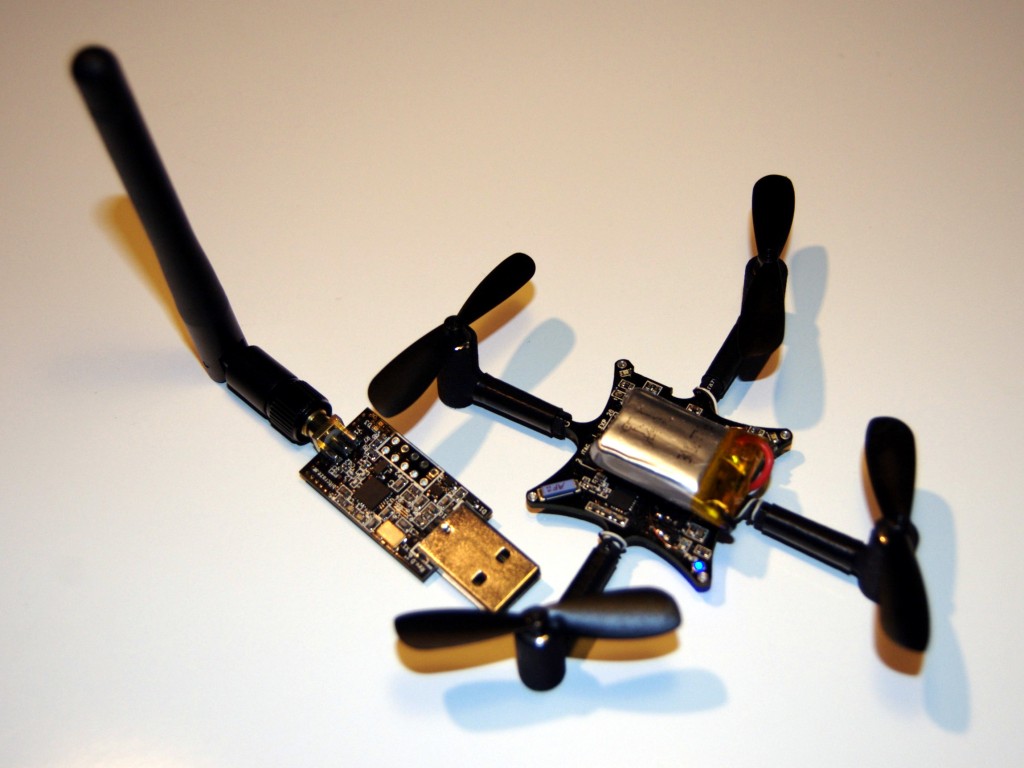
The Crazyflie will be controllable from the CrazyRadio USB dongle. The dongle has a number of interfaces that can be used: USB, SPI/UART and PPM. A custom made controller could be connected to the SPI/UART or a RC remote to the PPM interface. If the dongle is connected to the computer using USB it can be interfaced using our Python library. Currently we are using a QT application together with a gamepad controller to interface the Python library but it’s also possible to do other stuff like one of our dreams: using openCV to track the Crazyflie and control it autonomously from a PC and a couple of webcams :)

Also we are still porting the code and testing the new prototypes. So far we haven’t fond any more problems than the JTAG reset.

A large part of this Monday was spent assembling and testing the new prototypes with the digital sensors which arrived today. Eager to try them out we pretty quickly got stuck when we tried to program them with the JTAG. The copter wouldn’t respond to any JTAG commands… After a long time of testing we found our rookie mistake: We have been moving around some of the signals now when we have digital sensors to make the expansion port use a dedicated SPI port and not share it with the radio, which is a great improvement. With this moving around we managed to put one of the motor outputs on the optional JTAG reset pin, NJTRST. The motors are pulled low so they don’t start unintentionally which then makes the JTAG go in constant reset :o This can be walked around by temporarily holding that pin low during the first programming of the boot loader which will then immediately remap the NJTRST pin to be unused by the JTAG. If the bootloader is never removed the problem is gone but if the boot loader is unintentionally overwritten then one have to do the “pull low” trick again. So now we have to decide whether to live with this flaw or do yet another board re-spin… :-( There are still plenty of sensor testing left to do that maybe need another re-spin.

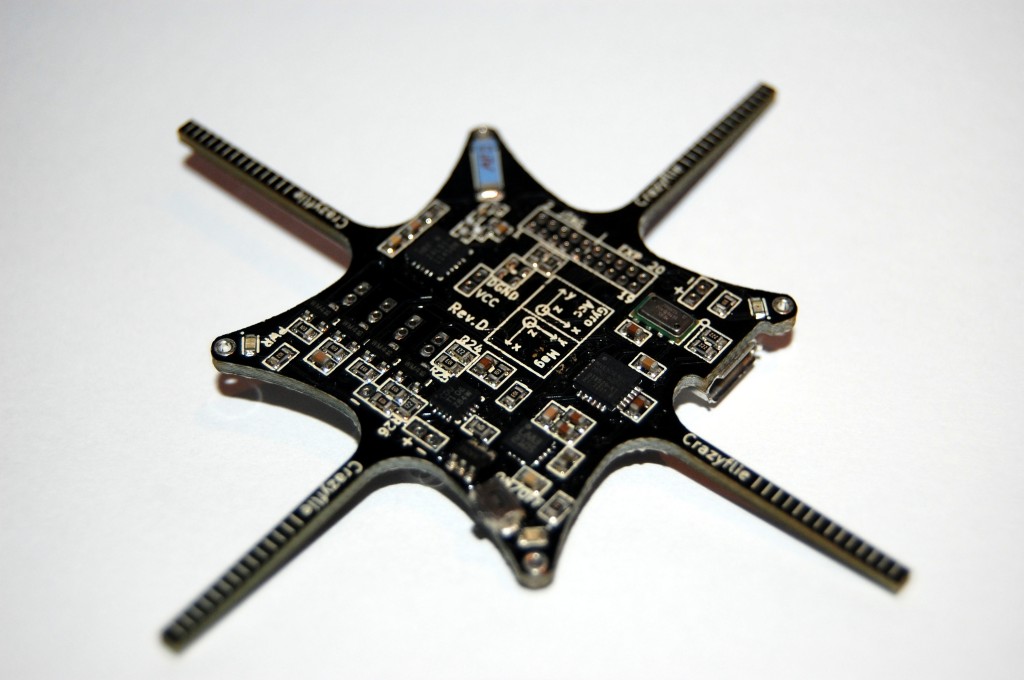
Before we have any maiden flight video the show below is a photo of the new Rev.D PCB. There are more in this album.

Crazyflie Rev.D PCB


Due to the IDG/ISZ-500 gyros EOL problem we are removing the  IDG/ISZ-500/BMA145 and going for the MPU-6050 instead. We where pretty certain the gyro part of the MPU-6050 would work but not so sure about the accelerometer.

To minimize the risk we wanted to try it out with our design before pushing the order button. We looked around for small IMUs with this chip and found that the FreeIMU uses the sensors that we are interested in testing. So we bought one and attached to the Crazyflie using the expansion connector. Here’s a image of what it looks like:

Since we now free up some space by replacing three sensor ICs with one we added a HMC5883L magnetometer and MS5611 pressure sensor which are the most common IMU sensors right now. If they will be mounted or not in the final version depends on cost and possible performance increase. If we don’t mount them there is always the possibility to do this yourself. Actually, as of this writing, we just made a virgin flight using the MPU-6050 data from the FreeIMU with good results.

We realized the other day that we have spent a lot of time discussing issues and developing stuff and not so much actual flying. We haven’t even left the rockie piloting stage… So when we met up on Sunday we spent a lot of time just flying around and having some fun :)

Here’s a first cut from some of the video we shot.

So as we were putting the finishing touches on what we hoped would be our last prototype before the final production version we noticed something rather serious on the InvenSense webpage. The IDG500/650 (and the ISZ-500/650) that we are using are EOL (and the LTB has passed). So this puts us in a rather tight spot where we have a couple of alternatives:

Stay with the IDG/ISZ 500/650 – We could stay with the sensors we have and try to source as many as possible but this would leave us in an awkward position if we get more demand than we can source gyros.

Analogue replacement – We could find an analogue replacement that would replace the X/Y and Z gyros we have today (that are analogue). The best candidate for this is currently the new ST gyro L3G462A but it is still under Evaluation and we don’t know if and when it will be available. It’s easy to put in our current design but we are unsure about the performance and immunity to vibrations.

Going digital – The most attractive option but the option that requires most work is switching from analogue to digital sensors. This is a step that we wanted to take eventually but taking it now delays everything but we do get a chance to get a bit more up to date by putting in a MPU-6050 and maybe a pressure sensor. But we are not sure how the sensors will respond to the vibrations and ripples on the supply voltage.

Our current plan is to drop the old analogue sensors from InvenSense and start on the digital design using the MPU-6050. We will keep the analogue ST gyro as a backup plan just in case we hit into any problems with the digital version.

Do you have any other ideas for sensors or comments about the performance of the MPU-6050 or L3G462A (if you managed to get a sample)?