Blog

A couple of weeks ago Qualisys visited us at the Bitcraze office, they came with the Miqus motion capture system that they installed temporary in the office. This gave us the opportunity to play with their motion capture system and the Crazyflie 2.0 :-).

It was our first hands-on experience with a motion capture system. We were eager to try the algorithms that have been developed for the loco positioning system with the more precise position information offered by the motion capture. The result was above our expectations. You get a bit amazed when it is just sitting there in the air. The normally difficult in-air photo shoot became a breeze since you suddenly have plenty of time to focus and shoot.

After running a couple of simple stabilized flight demos, we endeavored to run the ICRA demo with motion capture instead of our loco positioning system. As the loco positioning deck isn’t needed it was removed and instead the measured position was sent using Crazyradio. Doing so made the demo work pretty much out of the box. The ICRA demo had 2 buttons, one for playing a pre-recorded trajectory and one for recording a path and playing it back as soon as the Crazyflie is dropped. Both modes worked seamlessly without requiring any code change. We tried the path recording and playback functionality and were pretty impressed by the precision:

Link to video

We look forward of meeting and working more with Qualisys. One goal is to provide better information, documentation and tools to get started with Crazyflie in a motion capture system.

This week’s Monday post is a guest post written by members of the Robust Adaptive Systems Lab at Carnegie Mellon University.

As researchers in the Robust Adaptive Systems Lab (Director: Prof. Nathan Michael) at Carnegie Mellon University http://rasl.ri.cmu.edu, we’re interested in developing algorithms for control, planning, and coordination to enable robots to adapt to their environments, and we use the Crazyflie platforms to help us test our theory on real world systems.

We employ Crazyflie quadrotors to evaluate several research objectives in our lab. One research thrust looks at enabling a platform to learn new controllers as it flies, allowing the quadrotor to automatically switch between controllers to handle specific flight conditions. Another objective looks at adapting flight plans for multiple robots in real time, based on what a user tells the robots to do. We use the Crazyflie platform to evaluate our algorithms because the hardware is robust and the user community has helped make firmware available on which we can base our own systems (J. A. Preiss, W. Hönig, G. S. Sukhatme, and N. Ayanian. “Crazyswarm: A Large Nano-Quadcopter Swarm,” ICRA 2017. https://github.com/USC-ACTLab/crazyswarm). At the same time, the power and memory constraints of the Crazyflie force us to pursue efficient algorithms that can handle real world considerations such as limited battery life and computing restrictions.

We’re bringing these research ideas together to make an adaptive multi-robot system that a person can direct online and operate over long periods of time–longer than the lifespan of a single battery. In this blog post, we wanted to share a bit of information about some of the research we’re working on that uses the Crazyflie platforms. We look at single-robot controllers, multi-robot planning systems, and hardware designs to move us towards a persistent, adaptive swarm of Crazyflies.

Control Approaches

We have looked at implementing advanced control strategies onboard the Crazyflie for improved safety and flight performance. This includes an extremely efficient formulation of explicit Model Predictive Control (MPC) developed specifically for systems like the Crazyflie that have severe computational constraints due to size, weight, and power limitations. MPC optimizes the control commands based on current and predicted motion, allowing us to enforce speed limits and avoid motor saturation. The controller is run in a separate task on the STM32F405 MCU, allowing it to maintain a 100 Hz position control rate without blocking other components, such as the state estimator and attitude controller.

In the image above, the vehicle uses MPC control to rapidly and accurately move between two destinations. [V. R. Desaraju and N. Michael, “Fast Nonlinear Model Predictive Control via Partial Enumeration,” ICRA 2016.]

Multi-robot Systems

Another element of our research emphasizes adapting plans for multi-robot systems online, in order to translate a human operator’s intent into dynamically feasible and safe motion plans. We are using a swarm of Crazyflies for hardware validation of the online motion planning algorithms.

Our experimental testbed consists of a Vicon motion capture system that provides the state information (position and orientation) of the robots. The position coordinates and the heading angle are broadcast to the individual Crazyflies using the radios at a rate of 100 Hz. A centralized planner, running on a separate thread, parses user instructions into dynamically feasible and safe motion plans for each individual robot. The user instructions consists of high level information such as robot ids, behavior type (go to a target destination, rotate in a circle), and formation shapes (line, polygon, 3D). Once the feasible and safe motion plans are computed, the desired position setpoints are broadcasted to the Crazyflies at a rate of 30 Hz.

These images show a formation of 30 Crazyflies in a 3D shape and five groups of three Crazyflies, flying around a motion capture arena in response to a user’s direction. The multi-robot planner computes these flight plans online in response to the user’s commands, without any prior planning. [Ellen A. Cappo, Arjav Desai and Nathan Michael. “Robust Coordinated Aerial Deployments for Theatrical Applications Given Online User Interaction via Behavior Composition,” DARS 2016.]

Hardware Considerations 

As we move towards operating for long periods of time, we needed to incorporate the Qi inductive charger to enable the robots to recharge. We also want to retain the LEDs, to keep an aesthetic visual element and act as status indicators. There were two concerns with using both the standard LED and Qi decks: they both mount to the bottom of the Crazyflie, and both decks add weight. We created a combined deck based on the schematics from the Bitcraze wiki, and the final deck is shown below and weighs in at 6-7g.

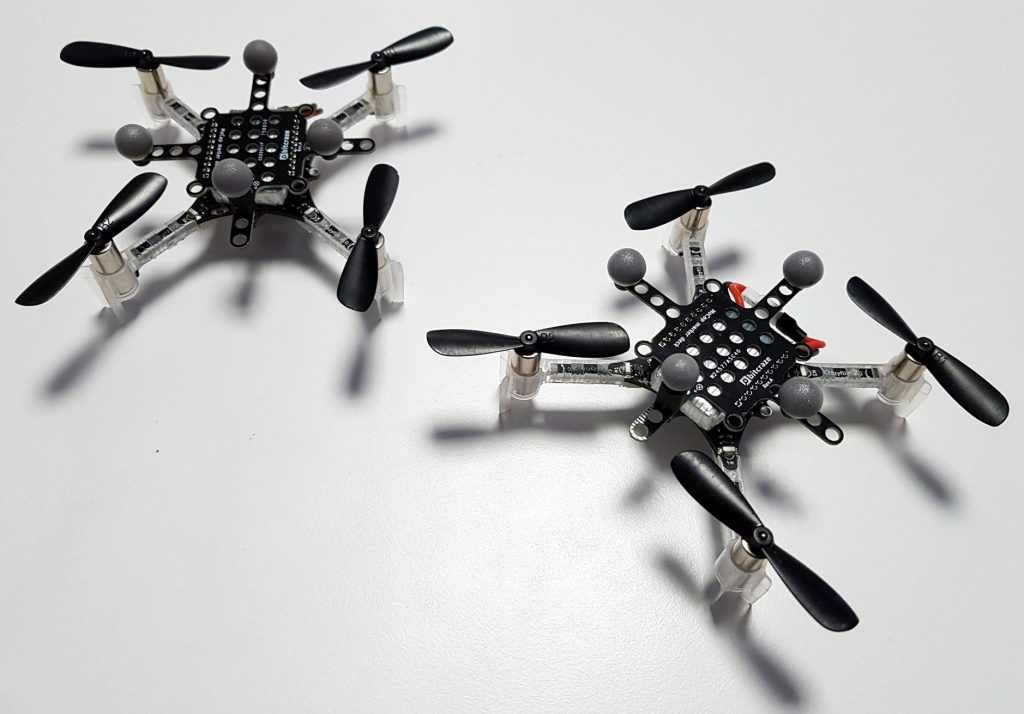
Even with the combined Qi + LED deck, we observe shorter flight times and motor saturation with the Crazyflie flights, so we increased the battery capacity and flying with different motor and propeller combinations. Pictured below is a Crazyflie with 7×20 motors using 55mm propellers and a 500mAh battery, and carrying a foam mount for the motion capture markers. No frame modifications are required as the motors fit in the mounts and the battery is chosen to fit within the header pins. These changes resulted in an increase in flight time, greater control margin and aggressiveness, and larger payload capacity.

Toward Persistent Operation

The capabilities we mentioned above allow us to work towards long duration operation. We are currently integrating our adaptive control, online planning, and efficient hardware design to enable persistent operation of a swarm of Crazyflies. To achieve this goal, we are developing scheduling algorithms that update flight plans based on battery capacities across a Crazyflie fleet. The flight planner calculates trajectories that allow robots with full batteries to exchange places with robots with expired batteries, landing Crazyflies that need to recharge onto charging stations. In the first image below, 10 robots rotate in a circle formation. The time-lapsed image shows three Crazyflies with full batteries (with blue LEDs) exchange places with three Crazyflies with depleted batteries (with red LEDs). The second photo shows a close-up of our Crazyflie charging station.

In closing, we show a few video clips of Crazyflie flight illustrating the research we discuss here. We show a group of fifteen Crazyflies following online-issued commands to split and merge between formations; a formation of 30 Crazyflies; and an example of our exchange planner, substituting robots into a multi-robot formation and returning robots to ground station locations.

Contributors: Ellen Cappo, Arjav Desai, Matt Collins, Derek Mitchell, and Vishnu Desaraju, students and researchers at the Robust Adaptive Systems Lab (Director: Prof. Nathan Michael), Carnegie Mellon University.

For a while now we have been selling the BigQuad deck which makes it possible to transform the CF2 to control a bigger sized drone. It does so by becoming the quadrotor control board, controlling external brushless motor controllers, which allows to scale up the size. This can be very convenient when trying out/developing new things as it first can be tested on the small CF2 and later scaled up by attaching it to a bigger quad. However for a more permanent setup it is a bit bulky, so we have been playing around a bit and designed something in the middle. The result is a stand alone control board targeting quads around 0.1 – 0.5kg.

We call it the CF-RZR as it is inspired by the smaller sized racers with some fundamental differences. It is designed with a higher level of autonomous functionality in mind and being easy to repair while still being fully compatible with the CF2 firmware and decks. Listing the biggest features of the current prototype:

  • Fully compatible with the CF2 firmware, expansion decks as well as radio.
  • Connectors to attach motor controllers (still possible to solder though) so it is easy to build and repair.
  • Power distributions built into controller board. (Max ~8A per motor controller though)
  • Motor controllers can be switched of by the system so the system can go into deep sleep and consume around 50uA.
  • Voltage input 1S-4S (3V to 17V)
  • Standard mounting (M3 mounting holes placed 30.5mm square)
  • External antenna for increased range

To summarize, the strength of the CF2 but in a little bit bigger package :-). Last week we got a chance to test fly it for the first time. We used a off the shelf racer frame, ESC and motors. At first it did not fly that well at all but after some PID tuning it became pretty stable and we had a lot of fun :-).

We would love your feedback, good/bad idea, what do you like/dislike etc!

Link to video

We exhibited at the IEEE International Conference on Robotics and Automation in Singapore a couple of weeks ago.

We had a booth where we demoed autonomous flight with the Crazyflie 2.0 and the Loco Positioning system, without any external computer in the loop. The core of the demo was that the Crazyflie had an onboard trajectory sequencer that enabled it to fly autonomously along a path, based on the position from the Loco Positioning system.

We had a pre programmed path that we used most of the time, since it enabled us to start the demo and the leave the Crazyflie without any further manual interference from our side (except changing battery). The other option was to manually record a path for the Crayzflie to retrace by moving it around in the flying space. When we dropped it (detecting zero gravity) the onboard sequencer and controller took over to replay the recorded path. This mode was very useful when showing the accuracy and performance of the system by recording a short sequence of one point and just leaving the Crazyflie to hover. We had mounted a deck with two buttons on the Crazyflie that we used to chose which mode to use.

The code used for the demo is available at github for anyone to play with.

Optical flow

We also showed our brand new Flow deck that we will release soon. It is a deck that is mounted underneath the Crazyflie with a downwards facing optical flow sensor. The sensor is in essence what is used in an optical mouse but with a different lens that enables it to track motion further away. The output from the deck is delta X and Y for the motion of the Crazyflie and can be used by the onboard controller to control the position. We will publish more information in this blog soon.

We had a great time talking to all you interesting, bright and awesome people. Thanks for all feedback, sharing ideas and telling us about your projects!

Last week while Kristoffer and Arnaud was in Singapore showcasing our Loco positioning system and Crazyflie at ICRA we initiated moving to a new bigger room here at The Ground. The Ground is a great business collective hosting offices for companies such as Mapilary, Monix, Castle to name a few. It is a very inspirational place to be with a great sharing climate which helps a lot for startups and early phase companies and we are happy to be part of it.

One of the nice things with the new office is that we now can have a dedicated flying area close buy and don’t have to run up and down the basement all the time. Hopefully this will help us speed up development and testing a bit, benefiting not just us, but the whole community :-).

So next time you get an email or forum post written from us you know where it is likely to have been typed.

We have been working with our indoor positioning system for over a year now and during that time the interest for the Loco positioning system have continuously been growing. Universities all over the world are already using our system and the attention we have received have been very encouraging. But the system has been a bit hard to set up and lacking in documentation. So we decided that this had to be fixed before we could leave early access.

So now we’re happy to announce that the Loco positioning system has reached a state where it’s out of “Early access” and we’re excited to see even more customers starting to use the system. We would like to thank everybody in the community that has been contributing to the project, this is what makes open source great!

Below are some of the steps we’ve taken to make it easier to use.


Getting started guide

We have created a brand new “Getting started with Loco positioning” tutorial that will replace the old “Getting started” video that we made. The tutorial contains a step-by-step guide for flying one Crazyflie 2.0 autonomously using two way ranging. The more advanced features such as TDoA is still considered as experimental and won’t be covered in this tutorial. We are very happy with the outcome of this tutorial but please help us out and try the tutorial and give us feedback.  

LPS tool

In order to easily configure and upgrade the firmware for the Loco positioning nodes we’ve created the LPS tool. With it you can set the address of the node, the mode and also upgrade the firmware easily. 


LPS tab

Up until lately there hasn’t been any support for the Loco positioning system in our Crazyflie Python client, instead we’ve been using ROS. It’s a great tool and very powerful tool, but ROS can be a bit complicated with specific requirements on the environment in which it runs. So we wanted to be able to perform basic use-cases directly in our client, like setting up the system, debugging it and flying with it. In order to achieve this we created the Loco positioning tab and a new flight mode called Position hold.

The Loco positioning tab is used to set-up the system and view it’s status. You can configure the position of the anchors, easily see which anchors you’re close to and if all the anchors are responding as they should. It’s also possible to see the layout of the system and the Crazyflies position in it.

For flying the Crazyflie we’ve added the Position hold mode. When enabled this will translate gamepad input into velocity control set-points that are followed using the positioning.


Wiki documentation

We’ve added technical documentation for the Loco positioning system to the wiki and we’ve also created product pages with schematics and details on the hardware for the Loco positioning node and deck. In the documentation you can find useful things like protocol documentation and details on our reference set-up that we use in our lab. Sine the system is still continuously evolving this is a working document that will continue to be improved over time and we hope to push the boundaries further for swarm flying and robotics in general.

ICRA

Finally a reminder, if your are attending 2017 IEEE International Conference on Robotics and Automation in Singapore you can meet us in booth C08 from 30/5 – 01/6. We will show autonomous flight with the Crazyflie 2.0 enabled by the the Loco Positioning System. Come by have a chat with us and see the Loco positioning in action!

You will also be able to attend the presentation of the paper “Crazyswarm: A Large Nano-Quadcopter Swarm” by researchers from USC during Wednesday 31/5 at 11:15.

Releases

To support the features mentioned above we’ve released version 2017.05 of the Crazyflie Python client and Crazyflie firmware.


A couple of weeks ago we played with recording and retracing trajectory directly from the Crazyflie using Loco Positioning System. The result was quite nice and resulted, a first for us, in a fully autonomous Crazyflie, no computer or controller required:

We decided to expand on this experiment for our demo at ICRA. We have modified the retracing code to accepts multiple modes, including running pre-programmed sequence. The plan for the demo is to have Crazyflies that can:

  • Record and retrace a manual trajectory
  • Record and replay in a loop a manual trajectory
  • Play a pre-defined trajectory in a loop
  • Land automatically when the battery level is low

With this we should be able to demonstrate quite well the capabilities of both the Crazyflie and the Loco Positioning system, and since we do not require a computer in the loop it simplifies a lot running the demo. Of course we keep the possibility to connect the Crazyflie with the Crazyflie client and with ROS while the crazyflie is flying.

Having a completly autonomous Crazyflie is also new to us and it brings its share of problems: how to we choose the working mode and how to we stop the flight if something happens (things tends to happen …).

To solve the former we have made a button deck that adds 2 push-button to the Crazyflie. One means “Start autonomous sequence”. The second means “Record trajectory”. If the recorded trajectory is a loop (if the end point is close to the start point) then the loop is played back as soon as the crazyflie is dropped, otherwise Crazyflie retraces the trajectory and stop.

We solved the later problem by making an autonomous emergency stop button that sends a radio watchdog signal. If the signal stops to be sent or if an emergency stop signal is sent (ie. by pressing the button), the Crazyflie will stop all motors and drop. The button is implemented using a Raspberry pi, a Crazyradio and an Arduino to interface the button:

If you are curious about code, we have created a github repos where we push all code we are making for this demo. As usual, this conference is an opportunity for us to hack new functionalities, though not everything can be done in the master branch. Later some things can be merged, others (like the retrace trajectory recorder/player that looks more like a user app.) will need much more though if we want to merge it in the Crazyflie firmware.

We are going to the IEEE International Conference on Robotics and Automation in Singapore. The exhibition is open Tuesday May 30 to Thursday June 1 and we will have a booth, number C08, where we will show demos and discuss our work, positioning technologies and quadcopters.

We have not finalized our demos yet but they will include autonomous flight with the Crazyflie and the Loco Positioning system. We also hope to show our brand new optical flow expansion deck that will enable positioning and autonomous flight when on a tight budget. We also plan to show integration with external computers running ROS or our own python library. If we are lucky there might even be a small swarm, even though the space is very limited.

We love to talk to people that are using our products or just interested in our technology, if you are at the conference please drop by and say hi and tell us what you are working on. We will arrive in Singapore on Saturday morning May 27, and if you want to hook up and say hi and have a coffee during the weekend, drop us an email.

See you in Singapore!

Ever since we released the Alpha round of the Loco positioning system we’ve been talking about designing a more generic tag that could be used together with other robotics platforms for local positioning. We did a quick design of a prototype that we tested, but with the workload involved in bringing the LPS out of Early Access, finishing the Z-ranger and lots of other stuff , it’s remained on the shelf. But recently we’ve been getting more and more requests for this kind of hardware, so we thought it might be time to dust off the prototype and try to release it. One of the blockers (except workload) has been that we’re not sure how the tag should look mechanically and how to interface it electrically for it to be as useful as possible for our community. This post is for detailing the current status of the hardware/firmware and to see if we can get some feedback on what our community would like the finished product to look like.

The hardware

To make use of the firmware that’s been developed so far for the Crazyflie and the Loco positioning we aimed at making something similar to what we already have but with another form factor and slightly different requirements. As you might know the Loco positioning node can be configured as a tag, but there’s two drawbacks that we wanted to fix. First of all the Loco positioning node might be a bit big to put on smaller robots. Secondly the Loco positioning node can only measure the distances to the anchors, it doesn’t have an IMU to get attitude of the board and doesn’t have the processing power to run the same algorithms we have on the Crazyflie 2.0.

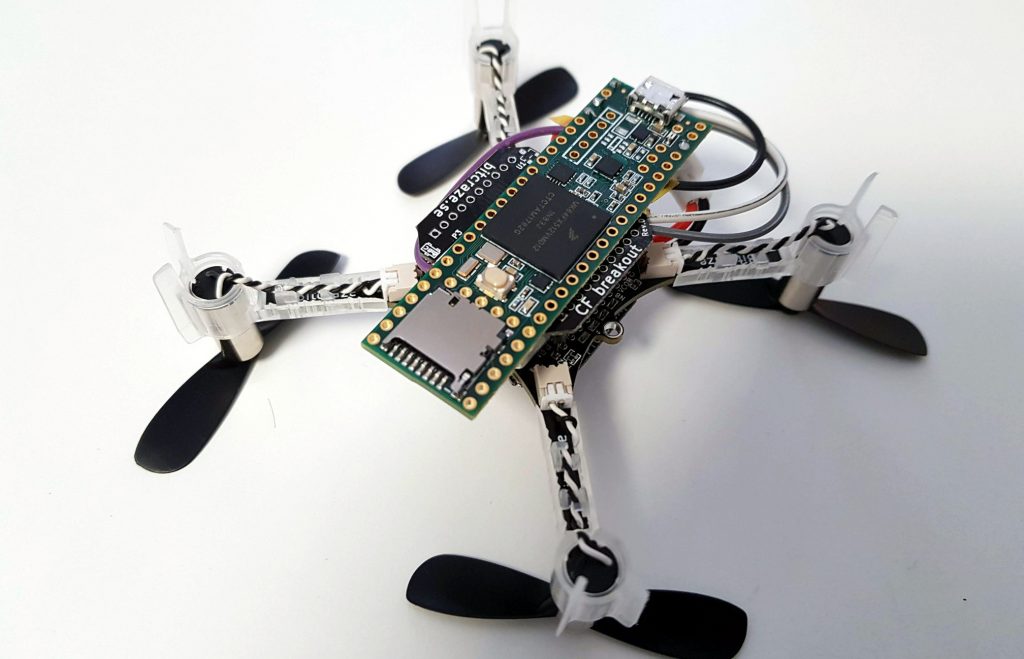
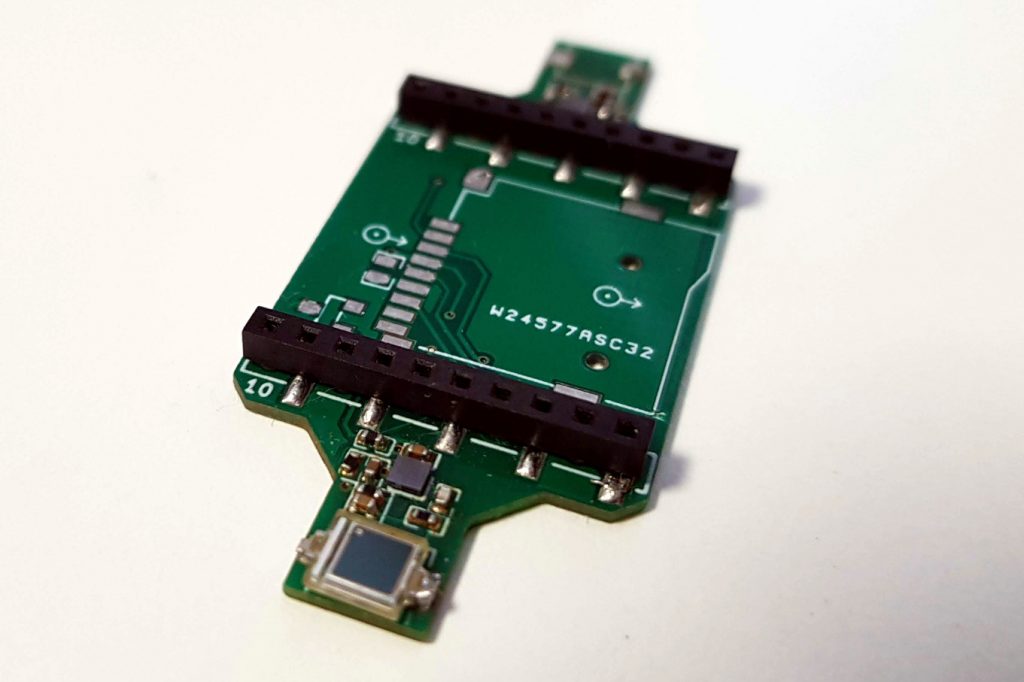
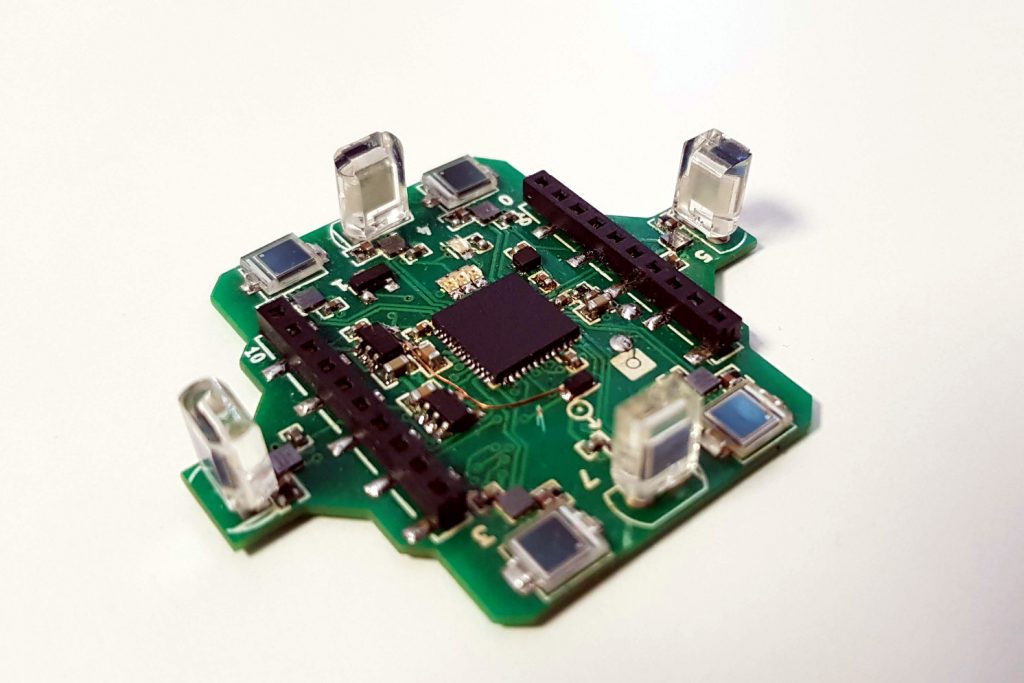
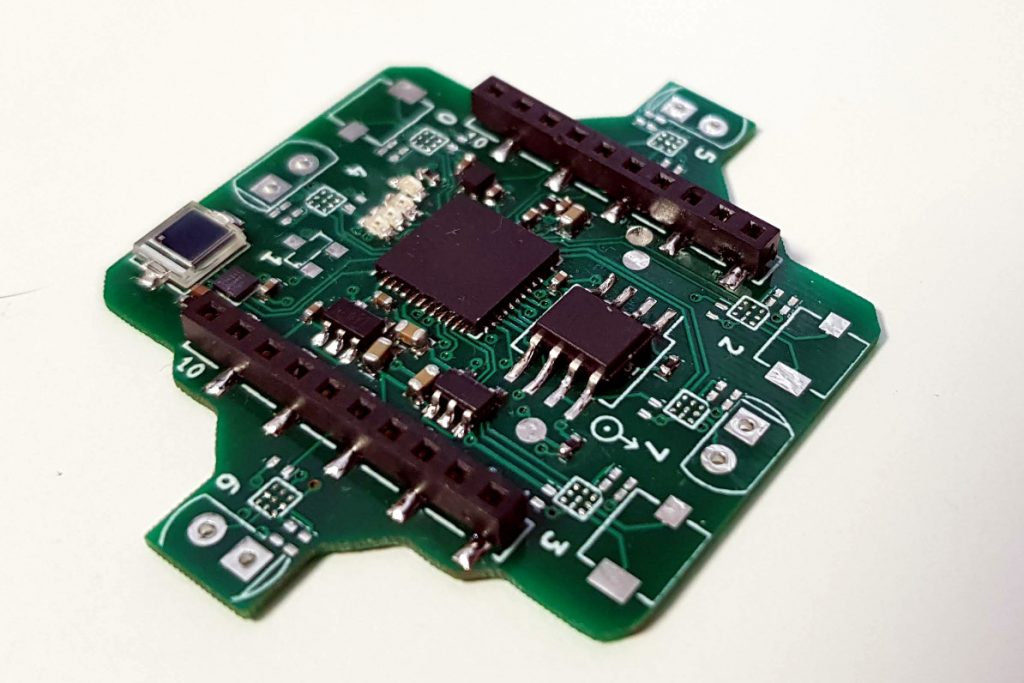
So for our Loco positioning tag prototype we decided to fix these. The prototype has the same sensors as the Crazyflie 2.0: Gyro, accelerometer, magnetometer and pressure sensor. It also has the same MCU as the Crazyflie 2.0: STM32F405. In addition to this it has the DWM1000 module for the ultra wide-band radio (used for positioning). We’ve also added the interfaces we have on the Crazyflie 2.0: SWD debugging, micro-USB for communication and power as well as a button. Looking at the pictures below you might also notice that we’ve added the Crazyflie 2.0 deck connector. So does this mean you can connect it to the Crazyflie 2.0? No, well not this prototype at least. The reason for adding it was we wanted to be able to use the same expansion decks as for the Crazyflie 2.0. So it’s possible to add the breakout deck for breadboard prototyping or the LED-ring for visual feedback.

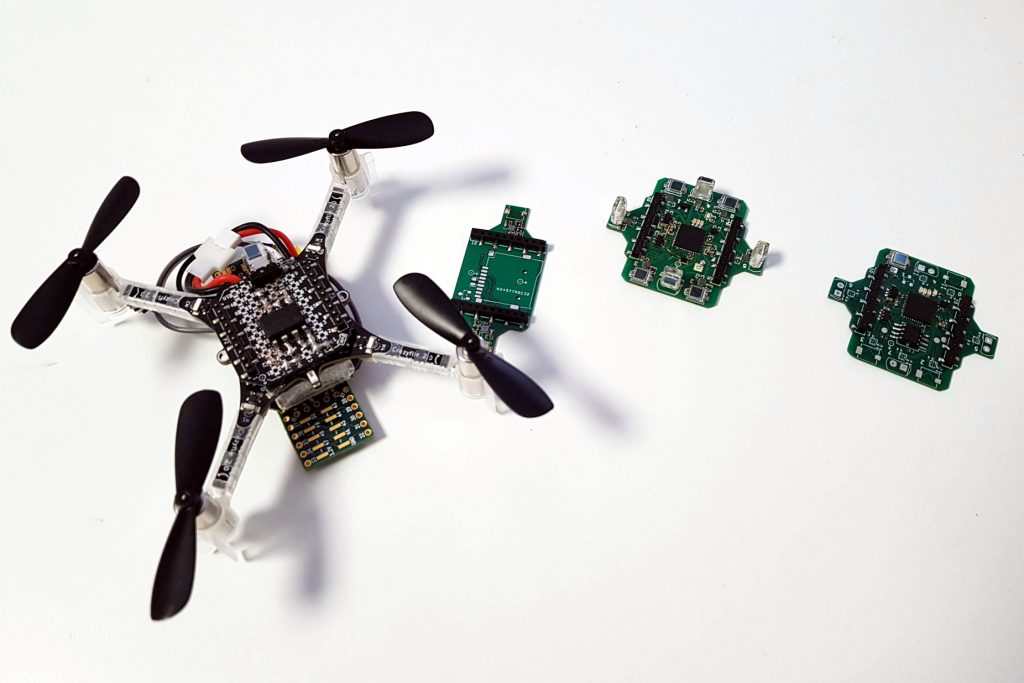
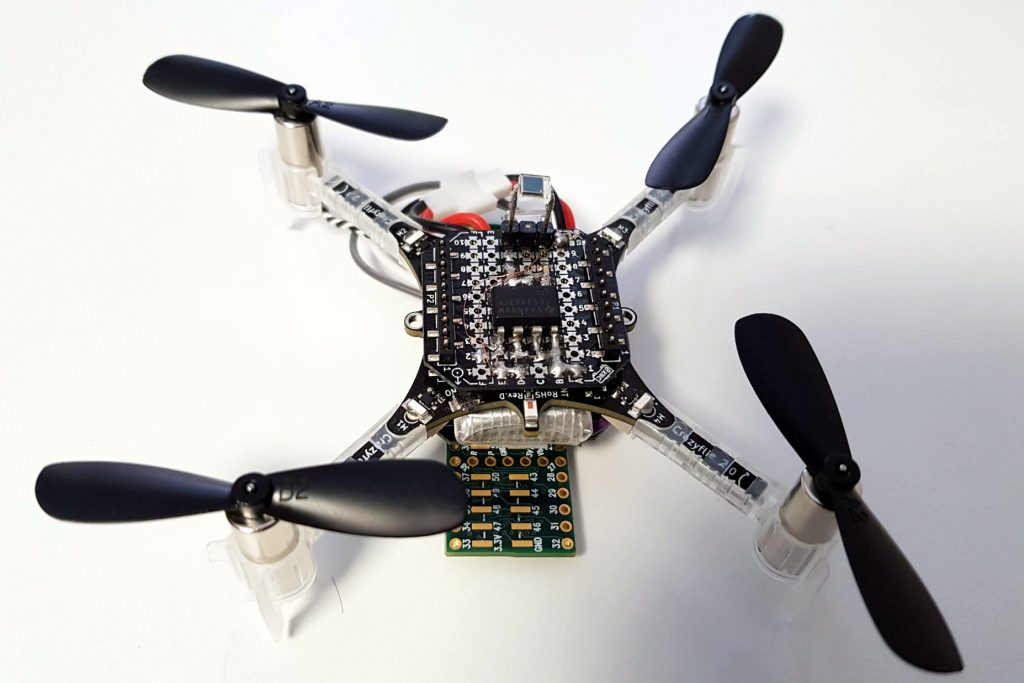
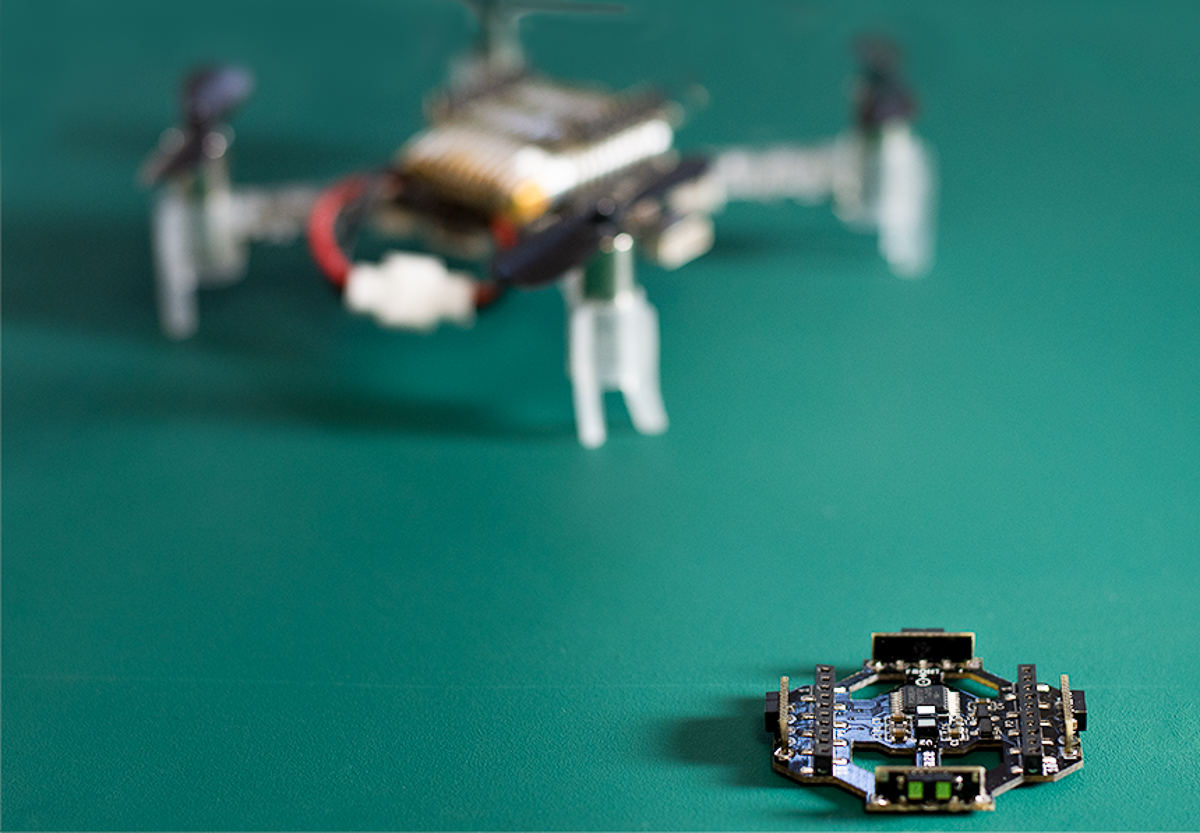
So what’s the status of the hardware? Even though it’s the first prototype it’s fully functional and will give you positioning and attitude. What’s left is defining the electrical interfaces and the form-factor of the board so it can easily be attached to what ever you might want to track. The images below shows a side-by-side comparison with the current Loco positioning deck.

Loco positioning tag (on the right) compared to Loco positioning deck (on the left) (FRONT)

Loco positioning tag (on the right) compared to Loco positioning deck (on the left) (BACK)

The firmware/software

Like I wrote above we wanted to reuse as much of the firmware and software as possible. So the firmware running on the prototype is just a scaled down version of the Crazyflie 2.0 firmware. As you might have noticed the prototype looks a lot like the Crazyflie 2.0, except that it’s not a quadcopter and doesn’t have the nRF51 radio. So by “scaled down” I mean we’ve removed the motor and radio drivers, that’s about it. So how do you communicate with it? Well you can use one of the protocol available on the deck connector: SPI, I2C or UART. But the currently implemented way is using USB. Since it’s basically a Crazyflie you can use our client and python libraries to set parameters and log data values from it.

Conclusion

The current prototype is basically a USB dongle where you get position and attitude. It could easily be connected via USB to a Raspberry Pi, Beaglebone or any other SoC based platform or a computer. You can also interface it from an Arduino using the peripherals on the deck connector. The firmware is working and using the python library (or any other of our community supported libraries) you can easily get the position and attitude of the board. But to be able to take the next step and make something our community could make the most of we would love some feedback on the prototype. What kind of electrical interfaces and form-factor would you like?

The past

The Crazyradio has been designed as a radio dongle to control the original Crazyflie 1. It is based on a Nordic Semiconductor nRF24LU1. It is basically the radio from Crazyflie 1, the nRF24L01, with a microcontroller and a USB device peripheral. Crazyradio has been designed from the beginning to be extended for other used: the code is completely open-source, can be powered with 12V and has an expansion port with possibility of implementing a serial port to communicate with the radio.

When we designed Crazyflie 2.0, we extended Crazyradio to make Crazyradio PA. It is basically the same hardware but we just added a power amplifier to make sure Crazyradio is transmitting with the same power as competing radio in the same 2.4GHz band: Wifi and Bluetooth. Crazyflie 2.0 is not using an nRF24 chip anymore but an nRF51822 which integrates a microcontroller and implements bluetooth low energy as well as nRF24 compatible radio.


The present

The Crazyradio (PA) has been used for a couple of hack like our glove controller. Another popular use has been by security researcher to experiment with the security of wireless mouse and keyboard. Indeed the nRF24 serie of chip is extensively used in wireless mouse, keyboard and even quadcopters ;).

We are often very quiet about the Crazyradio since ‘it just works’. It does not means that it is finished or perfect, there is actually a lot that was planned to make the radio link more efficient, to be able to control more Crazyflie per Crazyradio, etc… Some of this work has been done in the context of the Crazyswarm project by Wolfgang from USC but a lot more could be done. One of the main blockers for Crazyradio development is that it is based on a very old microcontroller, an 8051, and that it does not have a safe bootloader or (open) debugging access. It means that each modification is potentially a big commitment in time and since the radio already work quite well it is hard to put much time in it.

The absence of a safe bootloader means that if you flash a firmware that crashes, you will need an SPI programmer to recover the radio in working mode. This makes it quite stressful to work with the radio. However there are a couple of programmers made for this and we recently published a Hackster project about using a Raspberry Pi to recover the bootloader:

The future

We have been looking at making a Crazyradio with an nRF51-series chip, these chips have a Cortex-M0 CPU which means that they are much easier to program using a modern development environment. However none of the chip in the nRF51 series have USB which forced us to prototype the concept with an added microcontroller for USB. This creates a bigger and more populated Crazyradio:

We did not like this design very much since having 2 microcontrollers is always much more haste to program, debug and maintain. Thankfully Nordic semiconductor will release a nRF52 chip with USB support. Adding to that a powerful Cortex-M4 microcontroller, a lot of ram, still Bluetooth low energy and nRF24 radio compatibility but they also added iEEE802.15.4 2.4GHz (ie. the protocol used by Zigbee). This new chip is a very good candidate for the next Crazyradio.

We are very much in the pre-study phase for the next Crazyradio (and mass production for the new nRF52 is planned for Q4 2017 anyway…), so if there is functionality that you would like to see in a future Crazyradio it is time to speak up! Please tell us in the comment section bellow or in the forum ;-).