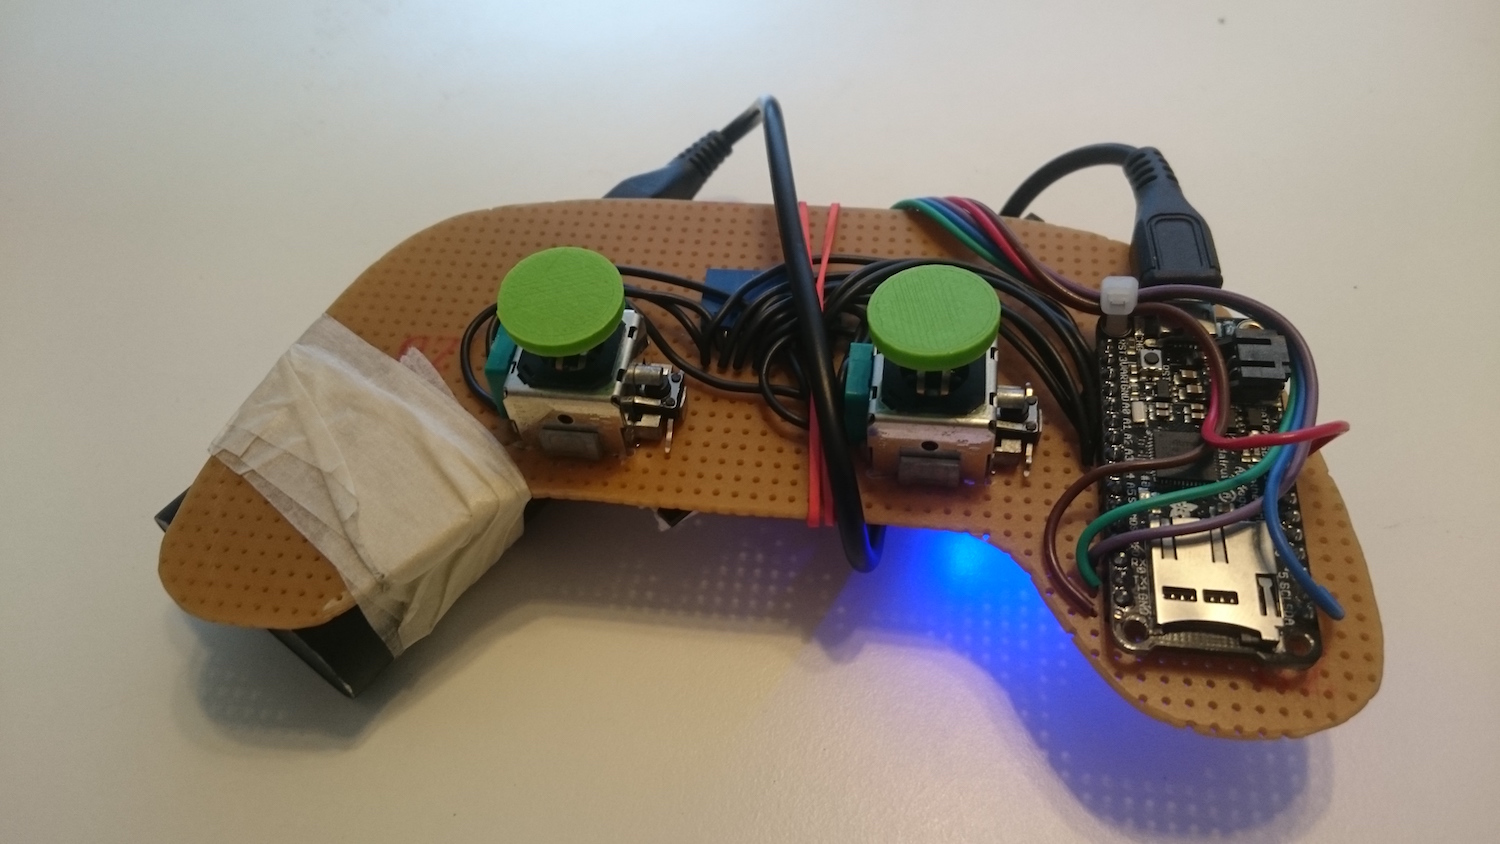
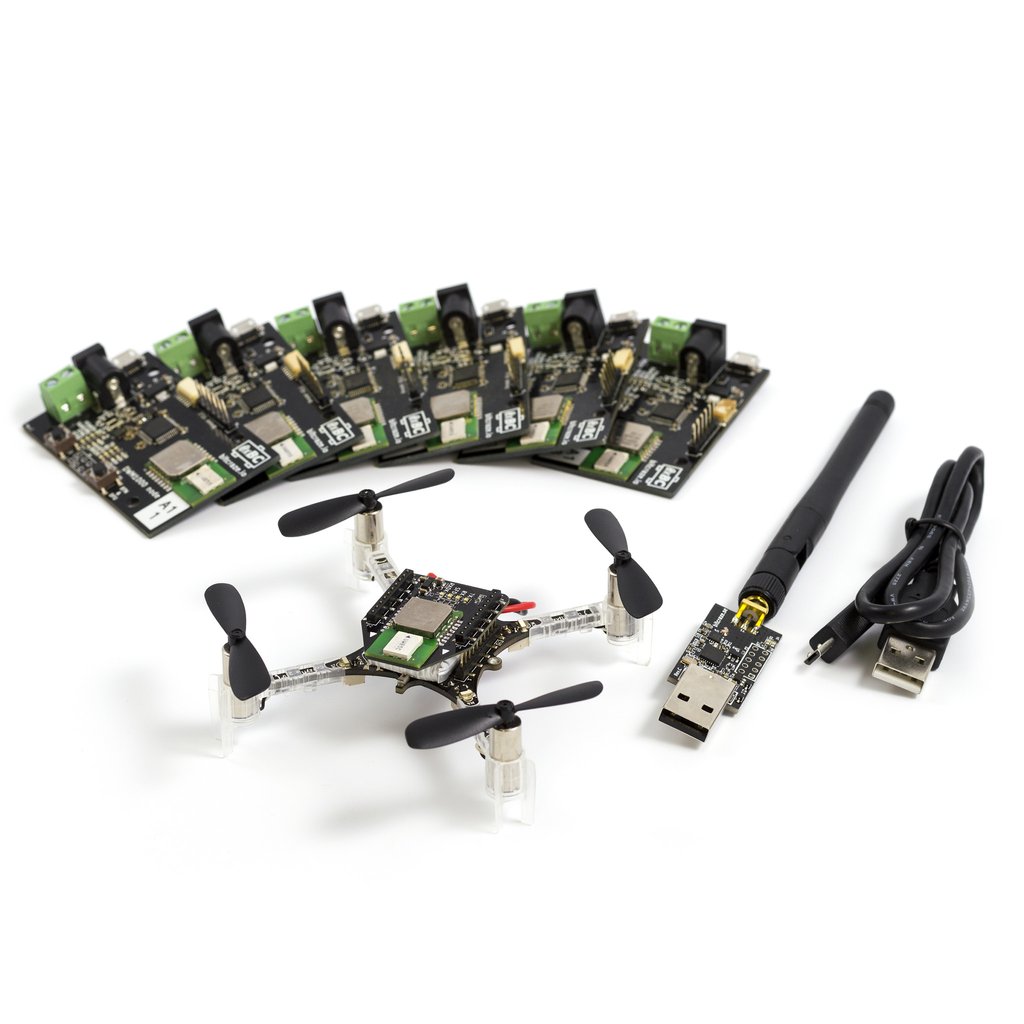
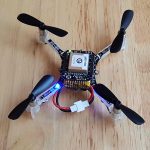
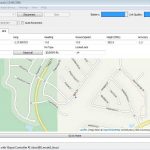
Blog

This weekend we went to the maker weekend at Hx in Helsingborg and showed off the Crazyflie 2.0 flying with the Kinect. It’s an awesome demo for fairs since it flies by itself and looks pretty good. Below is a few photos from the event.

But this time we ran into some issues with the set-up. When we first developed this we were running the image acquisition and processing on Linux using libfreenect2, but we later switched to Windows. The reason is these three lines. These lines map the depth measurement to the camera measurements and gives a set of “world-coordinates”. This is needed, since the distances left/right wouldn’t be correct without taking the distance away from the camera into consideration. Without it a left/right movement close to the camera would give a much larger response than one further away from the camera.

So to solve the issue above we moved everything to Windows, which would kind of solve the issue. But we started experiencing lag in the regulation, which originated from lag in the image processing. After doing some more digging we drew the conclusion that there was a USB issue when using the Crazyradio at the same time as the Kinect v2. Once every couple of minutes the FPS for the video will drop really low (which results in CPU usage going down as well). But disconnecting the Crazyflie (i.e not using the Crazyradio) seems to solve this issue. To work around this problem we currently have a set-up where we use two laptops. Since we’re running ZMQ to communicate between the applications it’s a quick operation to split it up on multiple hosts. So the Windows laptop runs image acquisition and processing and the Linux laptop runs the control-loop and Crazyflie client for sending the commands to the Crazyflie.

When we were first developing this there was lost of things happening in the libfrenect2 repo, so this might be implemented now. Does anyone have any tips for this? We would love to be able to run the system fully on Linux with only one laptop :-)

During the upcoming months we will be attending both the New York Maker Faire and the Berlin Maker Faire, hanging around the Seeedstudio booth. So if you want to see the Crazyflie/Kinect demo live or just to hang out and talk to us then drop by!

MF15NY_Badge1 icon_Berlin

A new version of the Crazyflie PC Python client has been released, version 2015.08. It’s been a while since the last release of the client so there’s a long list of changes, including lots of fixed bugs. The main new features are:

  • Student/Teacher mode:  It’s possible to use two input devices, where one can take over control from the other. This can be used for teaching or for working with a computer auto-pilot (doc)
  • Control the LED-ring from the Flight Tab:  Now it’s possible to turn on/off the headlights directly with a click and to select the LED-ring effect from a drop-down (doc)
  • New LED-tab to set custom patterns and intensity: Enables the user to individually set the color of each LED as well as the intensity of the LED-ring
  • ZMQ access to LED-ring memory and parameters: Write patterns for the LED-ring or set/get parameter values from an external application using JSON and ZMQ (doc)
  • ZMQ input device: Simulate a joystick by sending axis values in JSON via ZMQ. This can be used to implement a computer auto-pilot using for instance the Kinect (doc)
  • Switched from PyGame to PySDL2 on Mac OSX/Windows and native input device on Linux
  • WiiMote support

The next step after the release is to shape up the code a bit, so we’ve started using Travis for building and continuous integration. The long term goal is to run Flake8 and unit-tests on the code, but we still have a bit to go. The way we’re working towards this is by slowly enabling more and more checking in Travis, fixing one type of errors at a time.


This is the first post in the new category “How we work”. The intention is to write about how we work and evolve our company, as opposed to most of our other posts that are about the cool stuff we build.

First we need to take a look at the the history. Bitcraze was started by Arnaud, Marcus and Tobias in 2011 when they created the first Crazyflie. They all had day time jobs at the time and were working on the project on their spare time. Forming the company and taking the step to work full time with Bitcraze was the logical continuation of the success of the first Crazyflie.

They are all passionate about technology, innovation and creating cool things, but the possibility of working with interesting stuff was not the only reason to leave the safety of employment, an important driver to form the company was that none of them really felt comfortable in the companies were they were employed. They all have worked in multiple companies where they had more or less the same bad experiences and they wanted something else, something better. To understand the problem, take a look at Dilbert about shipping and managers :-)

During the years there have been interns in the company from time to time. One of founders donned the role of the “boss” to manage the intern and tell him what to do and to make sure the expected result was achieved. The problem was that they did not felt very comfortable with this, after all they were becoming the type of boss they disliked in their previous jobs, they were moving in the direction they had been running away from.

What to do? The three of them had equal relationships, no one was managing anyone else, so maybe one solution was to not employ any more people and continue the way it was? No, more people can do more fun stuff and they wanted to expand. During this spring Kristoffer started to hangout on Minc (the incubator where we are located) and we stared to talked about this problem. We talked about values, drivers, what we want to get out of work and life. Kristoffer has a similar background with similar experiences from the companies he has worked at and they all realised they were looking for the same thing.

I (Kristoffer) became the first employee in Bitcraze, in June, and we have taken an important step in building the company we want want to work in. We don’t really know where we will end up, but know that it is a continuous journey and that we will change over time.

There is a book full of inspiration and clever insights that everyone, interested in this type of problems, should read,  it is called “Reinventing organizations” and is written by Frederic Laloux, read it!

We have taken one super-important decision that will be the basis for all future work:

No one in the company can decide what someone else should do

Yes, that’s right, no one is the boss and no one is a manger – we are self organising. We’re in this together and will evolve together.

DWM1000 nodes
Last hacking-Friday we have had some time to put together the DWM1000 boards we ordered during the summer. The DWM1000 from Decawave is an ultra-wide-band ieee802.15.4 radio transceiver that can very precisely timestamp packets arrival and departure. More simply it means that it is a standard and it can be used to implement a real time local positioning system: this could be really handy for the Crazyflie. We soldered all the boards and we got some basic ranging working on the nodes. The next step is to implement an opensource driver to be able to implement the ranging in the Crazyflie. We will keep you updated on the progress but in the mean time here is a photo of the prototypes:

DWM1000 nodes and deck


Things happening on the firmware side
Recently the commit rate for the Crazyflie 1.0/2.0 firmware has increased a lot. Some of it because of pull requests, great work, and some because we are starting to move in hacks and such on feature branches into the master branch. Our new college Kristoffer has taught us that having stuff on feature branches can be a bad idea, they tend to stay there. It is then better to have them compile switched and in the master branch as it is more visible and get a better chance of getting in for real.

Github crazyflie firmware contributions


Here are some of the recent thing going on:

  • A situation awareness framework originating from this pull request by fredgrat. It allows the Crazyflie 1.0/2.0 to react to triggers. Currently there is a free-fall, tumbled and at-rest detection. He recently also submitted an auto-takeoff functionality. Enable the functionality with the define here.
  • The beginning of a Arduino like API for the deck port. Currently GPIO and ADC are the only functions there but more will come.
  • Possibility to fly in rate (acrobatic) mode committed here. Support in the cfclient for this is being developed so currently one have to change the parameters to activate it manually.
  • Carefree, plus and X-mode implemented in firmware. There is also support for this being added to the cfclient.
  • Automatically switch to brushless driver. Motor driver being rewritten so it can be dynamically configured. This means that if the Crazylfie 2.0 is attached to the big-quad-deck it can automatically switch over to the brushless driver during power on.

Summertime are good times, less administration and more time to develop! As soon as things has been integrated and fully tested we will do a new release of the firmware and the cfclient :).

Starting this week we’re all back at our desks and after getting some time off, recharging our batteries, we’re slowly getting up to speed again. The summer has been spent on everything from improving our server environment to cleaning up both the firmware and the client. We’ve also been working on some new things, like the iOS bootloader and prototyping new decks for the Crazyflie 2.0.

Now it’s full speed ahead into an exiting fall with lots of things happening!

As a side note we are going to Maker Faire Berlin the 3&4th of October and we are planing to do a Bitcraze meet-up in Berlin while we are there. We started a thread in the forum to talk about it.

Big Quad Deck
Today we received the revised big-quad-deck PCBs. We made the connectors fit a bit better, and fixed the deck port connectors being mirrored,  and it is starting to look quite good. Next up is to implement the firmware functionality, which is the biggest work. If you have any ideas or suggestions on the design please let us know!

Big-quad-deck v2

Big-quad-deck v2 mounted


Big Quad Deck

So last week we received the first prototypes of the Big-quad-deck. With this deck it will be possible to transform the small Crazyflie 2.0 into a flight controller of a bigger quad. It does this by using some of the deck port pins to drive brushless motorcontrollers. This has been explained how to do using a prototype board in a previous post. For those that like it to be more convenient the Big-quad-deck will be a good choice. This will also use the one wire memory so that it will automatically detect the big-quad-deck board and configure it, that is the idea at least :-). So currently the dynamic motor driver is one of the things we are working with. Well that and fixing the layout of the board as there was a major mistake of mirroring the deck port connectors… no blaming :-)

big-quad-deck
Big-quad-deck with cf2


iPhone bootloader

The bootloader is finally implemented on iPhone. The change have been pushed to github and will be released before the next firmware release. The GUI is simple and hopefully clear enough:

bootloader-flashing bootloader-idle

The iOS app fetches the latest firmware directly from GitHub and the flashing operation takes about 10 minutes. All new code written for the app is written in Swift, there is an ongoing work to cleanup the app architecture to make it easier to implement more advanced functionality like log/param. We are actually thinking of converting the full app in Swift to make it easier to work with.

The next step is to implement the bootloader in the Android client, this will be one of our main tasks for next week.

The summer here in Sweden is what it is, barely warm enough to earning the name summer. Every year you hope that this year will be the good year and most often you get disappointed. It however encourage productivity instead of  lying on a beach which is a good thing. So as we are currently closing open tasks that never really got finished it doesn’t feel so bad :-). The list is however big with about 130 items so we will have to see how far we get.

One of the items to close was to merge the Crazyflie 1.0/2.0 firmwares. As the two systems are quite different it took a while to get them to compile after they were merged and even longer before they both worked. Now it has been tested for a while and we feel confident there are no major bugs. Therefore the merged software are now moved to the master branch and this is from now on where we will accept pull requests. So if you are developing for Crazyflie 2.0 please move to the master branch!

When it comes to differences on the firmware for 1.0/2.0 it is working similar as before. The new thing is that when you run make it will default to building the Crazyflie 2.0 firmware and to build the Crazyflie 1.0 firmware one needs to run “make PLATFORM=CF1”. The binaries produced will have naming cf1.bin and cf2.bin for Crazyflie 1.0 and Crazyflie 2.0 respectively.

cf2 build in VM


Arduino inspired deck API
At the same time as the merging work has been going on a Arduino inspired deck API is starting to develop. Arnaud put together the GPIO base and fredgrat from the community was quick at developing the analog part and sent us a pull request, thanks! If anyone else feels like contributing it would make us really happy. And who knows, another part of the world might also experience a shitty summer encouraging productivity (or shitty winter for that sake) :-).

We have had a lot of deck ideas for the Crazyflie 2.0 but not much time to finish anything, now we finally took the time to order batch PCBs at seeeds so we though we could show a bit what we are working on. Our idea is to order during the summer while some of us are in vacation so that we have all the hardware available when everyone comes back.

One deck that we are working on for a long time is the GPS deck:

ublox GPS deck

We had a prototype last summer but we never managed to get it to work properly: the antenna of the module we used relied too much on the ground plane and was disturbed by the proximity of the Crazyflie. Now we are using a more traditional chip-antenna which, we think, might work better in our design. We also added a u.fl connector to add an external patch-antenna in case the chip antenna is not good enough.

Lately we posted about connecting Crazyflie to a bigger quad frame to use it as a flight controller. We made an adapter deck for this purpose:

Big quad addapter deck


The deck can be on top or bottom of the Crazyflie and has output for 4 motor controller, a SPPM input for RC receiver, monitoring input for battery current and voltage, I2C connector and finally a GPS connector. We tried as much as possible to use standard pinout for the connector. Finally this board has holes spaced at 30.5mm, which is common for attaching controller boards.

Some time ago we have seen an interesting kickstarter that implemented local positioning, the pozyx project. While looking at it we found that the transceiver they are using is available, it is the DWM1000. We are really interested about this technology so we made a deck out of it:

dwm1000 deck


The DWM1000 tranceiver allows for time-of-flight measurement which would allow to make a local positioning system. This is something we have been looking at for a long time. Of all the prototype board this is the one that might take the most time to develop though, as the software work will be extensive.

Another board we wanted to do for a while is an Intel Edison adapter deck:

edison


One thing that delayed us to make this board is the use-case: the main use-case we see for Edison is to connect a camera but the Edisson does not have the MIPI interface required to connect a small and lightweight camera. On this deck we wired the USB port both to a uUSB connector and to breakout pins giving options on how to connect a USB camera.

Finally for the end we keep the simplest but very useful for development FTDI cable adapter deck:

ftdi


On the middle of this deck can be connected a standard 3V3 FTDI cable, and jumper allows to connect the RX and TX pins to UARTs on the deck port. It can be used both to debug the Crazyflie 2.0 firmwares and to debug other decks (for example to talk to the GPS deck).

We will keep you updated when we have received and gotten to work the boards (some will be much quicker that other as you can imagine).

A while ago we implemented something we called mux-mode for controllers, where the Crazyflie can be controlled from multiple controllers at once. Initially it was implemented the day before a “bring-your-kids-to-work” day at Minc (where our office is). The idea was that the kids would control roll/pitch from one controller and we would control thrust/yaw from another controller. But we would also have the possibility to take over roll/pitch by holding a button on our controller. It was a big hit and let’s just say the “take-over” functionality came in handy :-)

A couple of months later we started working with the Kinect v2 with the goal of automatically piloting the Crazyflie using it. Again the input-mux feature came in handy. Instead of having the kids controlling the roll and pitch, the autopilot was now doing it. This enabled us to work on one problem at a time, first roll/pitch then yaw and finally thrust. When we were finished the autopilot was controlling all of the axes and we just used the “take-over” functionality when things got out of control.

So far this functionality has been disabled by default, but last week we fixed it up and enabled the code. With this change we’ve renamed the feature to teacher/student and also changed the way mappings are selected for the client. Below is a screenshot of the new menu, but have a look at the wiki for more details. If you want to try it out, pull the latest version on the development branch. It’s a great feature if you know someone that want’s to try flying for the first time!

On a side-note we tried some other ways to mix the controllers, like one we called “mix-mux”. This would take the input from two devices and add them together, so if both give 25% thrust the total would be 50%. It was really fun to try, but impossible to fly (maybe we need to work on our communication skills…).

Historically our server environment has been pretty basic and manual. The main focus in the company has been to build awesome copters, so managing the infrastructure for delivering services such as web, forum and wiki has been low priority. The services has been up and running most of the time, which after all is the most important property, but making changes has required a fair amount of manual work and has also been associated with some unknowns and risks. When you don’t feel safe, or if the procedure is not sufficiently simple we have a tendency to avoid doing stuff. The end result has been that we have not updated our web as often as we would have liked.

During the summer we are trying to catch up and clean out some of the technical debt we have left behind – including the infrastructure for the web. In this post I will outline what we are doing.

Goals

So, we want to simplify updates to our web, but what does that mean to us?

  1. It should be dead simple to set up a development environment (or test environment) that has exactly the same behaviour as the production environment.
  2. We want to know that when we make a change in a development environment, the exact same change will go into production – without any surprises.
  3. After developing a new feature in your development environment, it should be ultra simple to deploy the change to production. In fact, it should be so simple that anyone can do it, and so predictable that it is boring.
  4. We want to make sure our backups are working. Too many people did not discover that their backup procedures were buggy until their server crashed and had to be restored.

We want to move towards Continuous Delivery for all our systems and development, and these goals would be baby steps in the right direction.

Implementation

We decided that the first step would be to fix our web site, wiki and forum. The web is based on WordPress, the wiki on DocuWiki and the forum on PhpBB and they are all running on apache with a mysql database server on a single VPS . We wanted to stay on the VPS for now but simplify the process from development to production. We picked my new favourite tool: Docker.

Docker

Docker is by far the coolest tool I have used the last couple of years. I think it fundamentally will change the way we use and manage development-, test- and production environments, not only for the web or backend systems, but probably also for embedded systems. For anyone that wants to move in the direction of continuous delivery, docker is a must to try out.

So, what is Docker? If you don’t know, take a look at https://www.docker.com/

The typical workflow when creating new functionality could be

  1. Make some changes to the codebase and commit the source code to your repository.
  2. Build and run automated test
  3. Build a docker image from the source code
  4. Deploy the image in a test environment and run more tests
  5. Deploy the image to production

Preferably steps 2 to 5 are automated and executed by a server.

In the docker world images are stored in a registry to be easily retrievable on any server for deployment. One part of the docker ecosystem is the public registry called Docker Hub where people can upload images for others to use. There are a lot of good stuff to use, especially the official images created by docker for standard applications such as Apache, MySql, PHP and so on. These images are a perfect staring point for your own images.  In the workflow above we would push the image in step 2 to the registry and pull it in step 3 and 4.

Private registry

It is possible to push your images to the public Docker Hub but our images will contain information that we don’t want to share such as code and SSL certificates, so we needed a private registry. You can pay for that service in the cloud, but we decided to go for our own private registry as a start.

There is an official docker image that contains a registry that we used. Your registry requires some configuration, and you could create your own image from the official image + configuration. But, then where do you store the image? Luckily it is possible to run the registry image and pass the configuration as parameters at start up. The command to start the registry ended up something like this:

docker run -d --name=registry -p ${privateInterfaceIp}:5000:5000 -v ${sslCertDir}:/go/src/github.com/docker/distribution/certs -v ${configDir}:/registry -v ${registryStoragePath}:/var/registry registry:2.0 /registry/conf.yml

The default docker configuration is to use https for communication so we give the registry the path to our ssl certificate, the path to a configuration file and finally somewhere to store the files in our file system. All these paths are mapped into the file system of the container with the -v switch.

The configuration file conf.yml is located in the configDir and the important parts are:

version: 0.1
log:
  level: debug
  fields:
    service: registry
    environment: development
storage:
    filesystem:
        rootdirectory: /var/registry
    maintenance:
        uploadpurging:
            enabled: false
http:
    addr: :5000
    secret: someSecretString
    debug:
        addr: localhost:5001
    tls:
        certificate: /go/src/github.com/docker/distribution/certs/my_cert.fullchain
        key: /go/src/github.com/docker/distribution/certs/my_cert.key

The file my_cert.fullchain must contain not only your public certificate, but also the full chain down to some trusted entity.

Note: this is a very basic setup. You probably want to make changes for production.

Code vs data

A nice property with docker is that it is easy to separate code from data, they should basically go into separate containers. When you add functionality to your system, you create a new image that you use to create a container from in production. These functional containers have a fairly short lifecycle, they only live until next deploy. To create a functional image, just build your image from some base image with the server you need and add your code on top of that. Simply put, your image will contain both your server and application code, for instance Apache + WordPress with our tweaks.

When it comes to data there are a number of ways to handle it with docker and I will not go into a discussion of pros and cons with different solutions. We decided to store data in the filesystem of data containers, and let those containers live for a long time in the production environment. The data containers are linked to the server containers to give them access to the data.

In our applications data comes in two flavors: SQL database data and files in the filesystem. The database containers are based on the official mysql images while filesystem data containers are based on the debian image.

Backups

To get the data our of the data containers for backups, all we have to do is to fire up another container and link it to the data container. Now you can use the new container to extract the data and copy it to a safe location.

docker run --rm --volumes-from web-data -v ${PWD}:/backup debian cp -r /var/www/html/wp-content/gallery /backup

will start a debian container and mount the volumes from the “web-data” data container in the filesystem, /var/www/html/wp-content/gallery in this case. We also mount the current directory on the /backup directory in the container. Finally we copy the files from /var/www/html/wp-content/gallery (in the data container) to /backup, so they will end up in our local filesystem. When the copy is done the container will die and automatically removed.

Creating data containers

We need data containers to run our servers in development and test. Since we don’t have enormous amounts of data for these applications we simply create them from the latest backup. This gives us two advantages; first we can develop and test on real data, and secondly we continuously test our backups.

Development and production

We want to have a development environment that is as close to the production environment as possible. Our solution is to run the development environment on the same image that is used to build the production image. The base image must contain everything needed except the application, in our case Apache and PHP with appropriate modules and extensions. Currently the docker file for the base image looks like

FROM php:5.6-apache
RUN a2enmod rewrite
# install the PHP extensions we need
RUN apt-get update && apt-get install -y libpng12-dev libjpeg-dev && rm -rf /var/lib/apt/lists/* \
	&& docker-php-ext-configure gd --with-png-dir=/usr --with-jpeg-dir=/usr \
	&& docker-php-ext-install gd
RUN docker-php-ext-install mysqli
RUN docker-php-ext-install exif
RUN docker-php-ext-install mbstring
RUN docker-php-ext-install gettext
RUN docker-php-ext-install sockets
RUN docker-php-ext-install zip
RUN echo "date.timezone = Europe/Berlin" > /usr/local/etc/php/php.ini
CMD ["apache2-foreground"]

An example will clarify the concept

Suppose we have the source code for our wiki in the “src/wiki” directory, then we can start a container on the development machine with

docker run --rm --volumes-from=wiki-data -v ${PWD}/src/wiki:/var/www/html -p 80:80 url.to.registry:5000/int-web-base:3

and the docker file used to build the production image contains

FROM url.to.registry:5000/int-web-base:3
COPY wiki/ /var/www/html/
CMD ["apache2-foreground"]

For development the source files in src/wiki are mounted in the container and can be edited with your favourite editor, while in production they are copied to the image. In both cases the environment around the application is identical.

If we tagged the production image “url.to.registry:5000/int-web:3” we would run it with

docker run --rm --volumes-from=wiki-data -p 80:80 url.to.registry:5000/int-web:3

WordPress

WordPress is an old beast and some of the code (in my opinion) is pretty nasty. My guess is that it is mostly due to legacy and compatibility reasons. Any how this is something that has to be managed when working with it.

In a typical WP site, only a small portion of the codebase is site-specific, that is the theme. The rest of the code is WP itself and plugins. We only wanted to store the theme in the code repo and pull the rest in at build time. I found out that there are indeed other people that had the same problem and that they use the composer to do this (https://roots.io/using-composer-with-wordpress/). Nice solution! Now the code is managed.

Next problem is the data in the file system. WP writes files to some dirs in the wp-content directory, side by side with source code dirs and code pulled in with composer. There is no way of configuring these paths, but docker to the rescue! We simply created a docker data container with volumes exposed at the appropriate paths and mount it on the functional container. wp-content/gallery and wp-content/uploads must be writable and WP writes files here.

.
|-- Dockerfile
|-- composer.json
|-- composer.lock
|-- composer.phar
|-- index.php
|-- vendor
|-- wp
|-- wp-config.php
`-- wp-content
    |-- gallery
    |-- ngg_styles
    |-- plugins
    |-- themes
        |-- bitcraze
    `-- uploads

To create the data container for the filesystem and populate with data from a tar gz

docker create --name=web-data -v /var/www/html/wp-content/uploads -v /var/www/html/wp-content/gallery debian /bin/true
docker run --rm --volumes-from=web-data -v ${PWD}/dump:/dump debian tar -zxvf /dump/wp-content.tar.gz -C /var/www/html
docker run --rm --volumes-from=web-data debian chown -R www-data:www-data /var/www/html/wp-content/uploads /var/www/html/wp-content/gallery

To create the database container and populate it with data from a sql file

docker run -d --name web-db -e MYSQL_ROOT_PASSWORD=ourSecretPassword -e MYSQL_DATABASE=wordpress mysql
docker run -it --link web-db:mysql -v ${PWD}/dump:/dump --rm mysql sh -c 'exec mysql -h"$MYSQL_PORT_3306_TCP_ADDR" -P"$MYSQL_PORT_3306_TCP_PORT" -uroot -p"$MYSQL_ENV_MYSQL_ROOT_PASSWORD" --database="$MYSQL_ENV_MYSQL_DATABASE" < /dump/db-dump.sql'

Note that the wp-config.php file goes into the root in this setup.

Now we can start it all with

docker run --rm --volume=${PWD}/src/:/var/www/html/ --volumes-from=web-data --link=web-db:mysql -p "80:80" url.to.registry:5000/int-web-base:3

Wiki

DocuWiki is a bit more configurable and all wiki data could easily be moved to a separate directory (I used /var/wiki) by setting

$conf['savedir'] = '/var/wiki/data';

in conf/local.php. User data is moved by adding to inc/preload.php

$config_cascade['plainauth.users']['default'] = '/var/wiki/users/users.auth.php';
$config_cascade['acl']['default'] = '/var/wiki/users/acl.auth.php';

Create the data container

docker create --name wiki-data -v /var/wiki debian /bin/true

When data has been copied to the data container, start the server with

docker run --rm --volumes-from=wiki-data -v ${PWD}/src/wiki:/var/www/html -p 80:80 url.to.registry:5000/int-web-base:3

Forum

PhpBB did not hold any surprises. Directories that needed to be mapped to the data filesystem container are cache, files and store. Database container created in a similar way as for wordpress.

Reverse proxy

The three web applications are running on separate servers and to collect the traffic and terminate the https layer, we use a reverse proxy. The proxy is also built as a docker image, but I will not describe that here.

More interesting is how to start all docker containers and link them together. The simplest way is to use docker-compose and that is what we do. The docker-compose file we ended up with contains

proxy:
  image: url.to.registry:5000/int-proxy:2
  links:
    - web
    - wiki
    - forum
  ports:
    - "192.168.100.1:80:80"
    - "192.168.100.1:443:443"
  restart: always

web:
  image: url.to.registry:5000/int-web:3
  volumes_from:
    - web-data
  external_links:
    - web-db:mysql
  restart: always

wiki:
  image: url.to.registry:5000/int-wiki:1
  volumes_from:
    - wiki-data
  restart: always

forum:
  image: url.to.registry:5000/int-forum:1
  volumes_from:
    - forum-data
  external_links:
    - forum-db:mysql
  restart: always

To start them all simply

docker-compose up -d

Conclusions

All this work and the result for the end user is – TA-DA – exactly the same site! Hopefully we will update our web apps more often in the future, with full confidence that we are in control all the time. We will be happier Bitcraze developers, and after all that is really important.