Blog

Last week was mostly spent preparing for, and travelling to Devoxx. It’s always great to get out a bit and meet other nerds, discuss technology and do some flying. Devoxx is a Java conference so we didn’t think that many people would be interested in hearing about quads and low-level embedded. But we were really happy to see that lots of people showed up for the presentation.

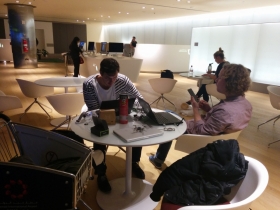
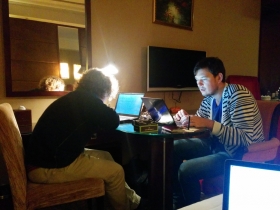
Presenting is fun, but the most fun part is always hanging around before and after. Meeting people, discussing and flying. This time we also got a chance to do some hacking with the team from MYO. Hopefully we will get our hands on a developer unit early next year :-)

The Crazyflie Nano Quadcopter kits, bundles and spare parts are now back in stock at Seeedstudio, but we are still waiting for the Crazyradio to be re-stocked. Our products are selling quicker than we expected, so if you want one for Christmas don’t wait too long to place the order.

[pe2-gallery album=”http://picasaweb.google.com/data/feed/base/user/115721472821530986219/albumid/5945707587870624705?alt=rss&hl=en_US&kind=photo” ]

Here’s some video of the FPV flying demo taken from someone in the audience.

Like we wrote last week we have been working on testing ST MEMS and comparing the performance to our current MPU-6050. Last week we had the sensors in place and were flying with them, this week we added a uSD card so we can  log them and compare them offline. Before we added the uSD card we had a discussion on how to easiest log the sensors simultaneously. Since the current logging framework isn’t made for this kind of high speed logging we thought about regressing back to our old logging for this test. In the old logging we packed as much data we could into each radio packet (31 bytes) and just sent it to the PC at a high rate. Instead of being a generic solution, like we have now, this requires changes in the client/firmware to change any variables logged. Even if we changed to this scheme we weren’t sure if the radio link would handle it. The idea was to log about 56 bytes @ 500Hz (~28kb/s) which would be accelerometer/gyro from the InvenSense/ST sensors and a time-stamp. Since the radio link is only specified to an air data rate of 2Mbit (about 400Kbit true downstream rate), and because adding a uSD card was something we wanted to try, we decided on the uSD solutions. We also wanted the option to log more data if we needed to. It was just supposed to be a quick hack, a couple of hours….. So the plan was:

  • Download and integrate FatFS. We could have gone with PetitFS, but more features is always better (even if you are just going to log to one file…)
  • Find an open source SPI driver back-end for FatFS for the STM32F103
  • Build, fly, investigate and go to lunch :-)

The estimated time for executing this plan was about 4 hours (we actually said about 1 hour from the beginning, partly kidding..,).  The execution was not as smooth as we planned. After working as developers for years, we still can’t avoid doing over-optimistic time-estimations. The goal with this was to be able to log all the data, but we never reached it. We encountered some of issues a long the way and the biggest one was the latency for the SD. From time to time it took > 200ms until the uSD was ready again after writing data to it. Buffering this much data was a problem. On a system with only 20kb RAM, lots of tasks (and stacks) and lots of queues to synchronize between them, it’s hard to create very large buffers. Finally we managed to allocate a ~5kb buffer, but we still had problems of it overflowing. We can’t spend more time on this right now so we have to settle for the data we have, but one day we will free up some time and come back to this.

Since most of the time was spent trying to get the data, there wasn’t much time over for the analysis. So far we can just say that the sensors are pretty similar in performance where the  MPU-6050 have a little edge. The ST gyros seems to have a little more stationary drift and noise.

Sensor drift stability

X-axis of gyro while hovering

Stationary noise

For a while Invensense’s gyros has been the MEMS sensors to use in multirotor  applications due to their good performance and vibration rejection. ST Microelectronics are also big when it comes to MEMS sensors but their gyros has not been that good when it comes to handle vibrations. In the beginning if 2013 they released the 3-axis gyro L3GD20 which are advertised to improve this and we thought we finally would do an investigation. So we bought a Pololu  AltIMU-10 board which has ST sensors and also the iNEMO module, LSM9DS0, which is a very sweet 9-axis 4x4x1mm chip. After a bit of a soldering exercise we got them both attach to an accompanying Crazyflie. The AltIMU-10 board we glued to the bottom and connected to the expansion I2C buss. The LSM9DS0 was a bit trickier and we removed the MPU6050 and used some of its components for the LSM9DS0 so we could glue it up-side down to the board. I think the picture speaks for itself. After some quick and dirty coding we managed to get them both working and flying. The flying capability is very similar to the MPU6050 and we can’t really tell the performance apart. We will have to investigate it in more detail and for that we are adding a SD Card breakout to write raw data from all sensors at full speed. That will be the exercise for next week so stay tuned!


[pe2-gallery album=”http://picasaweb.google.com/data/feed/base/user/115721472821530986219/albumid/5941229033309217905?alt=rss&hl=en_US&kind=photo” ]

It’s been a long time now since we released new versions of our software. So it’s about time :-)

Here are some highlights from the releases:

  • Altitude hold support in firmware, PC client and Raspberry Pi SD-card image
  • Bitcraze VM upgraded to Saucy Salamander (13.10)
  • Lot’s of bugfixes

One of our big topics of discussion at Bitcraze is how to release and when to release software. Our plan has changed over time and this time around we are trying something new. First off the version naming is (as before) constructed using the year and month. New for this release is that we decided to make a beta release before making the real release. If the feedback is good on the beta, we will just rename the release after a week of testing.

When it comes to handing the issues in Bitbucket we have tried an approach were we minimize administration. After every release we create a new milestone named after the last release (i.e 2013.11+). Everything that is supposed to go into the next release is then added to this milestone. When we do a new release all the resolved issues/implemented features that are closed and added to this milestone makes up the change log. Issues that are not resolved are moved to the next milestone.

The discussion we have had for the last week resolves around the release schedule and whether or not do do a pre-release (release candidate). Up until now we have had the goal to do feature-based releases (although there haven’t been that many releases…) but we have now started leaning towards trying period-based releases. We feel that it’s very easy to drag on and not release a new version since we want more and more features and fixes in it. Ideally we would select a few that would go in and then stick to it, but we are having a hard time doing this. Below is a quick outline of the idea we have for the future releases:

The idea is to release a new version of the firmware/client about every two months (8 weeks). First we create a new milestone that we assign issues/features that we think we will be able to fit in (i.e for the next release this would then be 2014.01). After 7 weeks we branch and create a release candidate that the community can download and try. If any major bugs are found they are fixed and then the release is done. Our goal with this is to release more often, even if the releases might contain less things.

So what do you think about doing period-based releases instead? We think that the community should have a say in this, since you are the ones using the releases. So go ahead and vote, we know you want to!

How should we do new releases of the firmware/software?

View Results

Loading ... Loading ...

The Crazyflie 10DOF has a pressure sensor that can be used as an altimeter. This sensors was waiting to be used and we had many contributors implementing altitude hold/hover mode for it. We recently merged one of the best working contributions to the main branch of both the Crazyflie client and firmware so that it is now a bit easier to experiment with it. The current code is based on the work done by omwdunkley who did a great initial job and you can read more about it in his post.

The altitude-hold is another control-loop that will try to keep the copter at the same altitude by using the altimeter and the accelerometer to sense the altitude and vertical speed. This is controlled by keeping a button pressed on the game-pad. When altitude hold is activated the thrust joystick axis controls the altitude set-point and thus are used to make the copter rise or fall.

Foam on the Crazyflie 10DOF altimeter

Foam on the Crazyflie 10DOF pressure sensor

From our test in a calm pressure stable room the altitude is held at roughly ±15cm. However we had some problems when we where moving around. The Crazyflie sometimes suddenly rose and went to the ceiling. After some debugging we found that the problem was mainly physical, the pressure sensor is exposed of dynamic pressure when flying. To fix that we cut some of the foam we have in the Crazyflie box (yes that was planed all along ;-), and we stuck it on top of the pressure sensor. Doing so greatly improve the stability when flying more aggressively! (Something we kind of knew from peoples suggestions but it is nice to see it working in reality)

This functionality still require some debugging, tuning and code clean-up, but if you want to test it just grab the latest version of the firmware and client from Bitbucket. To begin with check that the altitude hold function is well configured for you joystick mapping (we found that it is best set on the shoulder button of the thrust hand). The altitude lock will be activated as long as the button is pressed. It can be pressed while the copter is flying or while it is in the ground. If pressed when the copter is in the ground, you will have to press the thrust joystick up a bit to make the copter fly higher. We also recommend to be a bit experienced with flying the Crazyflie as the altitude hold sometimes requires a quick recovery manoeuvre ;-).

As you can see the webpage looks a bit different this Monday. For a long time we have had the feeling that new users coming to our webpage don’t get an overview of what we do and what the Crazyflie is. So we decided to put in a front page that is intended to introduce Bitcraze and the Crazyflie to new visitors. Since we feel that our blog is an important part of what we do we also added the last blog post to the bottom of the front page. If you are looking for the full blog it’s moved here, also there’s a link in the top menu.

We have also gotten the comment that there’s no information on the actual website, it’s all on the wiki. So we have added some new pages with a bit more descriptions of the development environment and the products. We will keep adding more and more information as we go. There’s still lots of work to do for the page and to enhance the website design, but we decided on doing it incrementally :-)

The nice new photos (in the slider and other images) are courtesy of our friend Johan Jeppsson, thanks!

Our products at the Seeedstudio Bazaar are almost out of stock. Currently there are still some 10-DOF bundles in the Seeedstudio US warehouse, but the 6-DOF is old out. Below is the estimations for when things are back in stock. If you are eager to get any of the products that are out of stock, then you can always check with our distributors. If the bundles go out of stock it is also possible to buy the 10-DOF kit and Crazyradio separately.

  • 10/6-DOF bundles and kits will be restocked mid November
  • Spare motors will be back in stock mid October

The new motors have a little neat update, the top bearing is concealed inside the motor housing. This will make it much more crash resistant from forces to the top since there is no bearing to depress. The small downside is that it might be little bit more difficult to remove hard sitting propellers.

Bitcraze bazzar stock

It’s always fun get a change to meet fellow geeks/makers so during this fall we will be holding two presentations, first in Denmark and then in Belgium. They will be held at CIID in Copenhagen in October and at Devoxx in Antwerp in November. If you are close by then make sure to come by and say hello!

Here are the details:

If you don’t have the possibility to attend any of these and still want to hear us speak, have a look at our presentation at Oredev we did last fall or at the video from Devoxx after the conference. If you watch our old presentation, then pay attention at around 42:00 when Arnaud flies a Crazyflie into my forehead… It was just a matter of time before it happened :-)

If you have any suggestions on conferences/events were you would like to see the Crazyflie then leave a comment below.

Devoxx

It’s been a week and so far no-one has decoded the complete message (at least not decoded it and followed the instructions…), Pär has made a great start with “first” but there is more to it ;-).  So as promised here’s more clues. The message is 320 bits long and the bits are organized so they form a square (i.e the rows are directly underneath each other). That together with the clue we gave last week should make it a bit easier to decode. And if you need some motivation to get decoding, there is a reward included with the instructions :-). Edit: The reward was clamed by Joerg, congratulations! For anyone that still wants to try and solve it, don’t look in the comments. You will find the solution there :-)

TheCode

One late night many months ago, we had a great idea! While finalizing the design of the Crazyflie box we decided to include a faint binary pattern in the background on the box. Taking a closer look at the box you will probably see it. After looking at it for a while you might notice a pattern emerging. The pattern reads 1011 1100 which equals 0xBC in binary, well most of it anyway. In some part of the code we decided to insert a message. We placed it in a way so it would be “easy” to notice the break in the main pattern. Now, this was well after midnight and we didn’t foresee all the problems that might occur.

Fast forward a couple of months and we get the first box from production in our hands. Turns out the binary pattern wasn’t as crisp as on the computer screen (doh..) and that it was shifted a bit from where we originally place it. To make things even worse the design had probably been panellized and the pattern wasn’t in the same place on all the boxes. This would never have caused any problems, except for the code that was hidden there…

We forgot about this for a while, but then we finally posted something about it. Then we sat back and waited for it to be found. But nothing happened. So we decided to finally sit down and try to decode it from scratch. Turns out that it takes longer to find and decode than Neo took to decode the code in the Matrix…. So we decided to make it a bit easier :-) Below is a scan of one of the boxes with a little Gimp-magic to improve the visibility. If you start looking at the 0 above the “y” you will probably find something interesting. It’s not easy, so if no-one finds it by next week we will keep giving clues.

TheCode