Category: Crazyflie

When I was started my Robotics Master back in 2012, I remembered how frustrated I was at the time to setup my development environment in Windows for the C++ beginners course. My memory is a bit fuzzy of course but I remembered it took me days to get all the right drivers, g++ libraries right, and to setup all in the path environmental in Eclipse at the time. Once I started working on Ubuntu for my Master thesis, forced to due to ROS, I was hooked and swore I will never go back to Windows for robotics development again… until now!

I always used Windows on my personal machine on the side for gaming and have a dual-boot on the work computer for some occasional video editing, but especially I had begun to learn game development for Fun Fridays, I started to be drawn to the windows side of the dual boot more and more. But if I needed to try something out on the Crazyflie or needed to debug a problem on the forum, I needed to restart the computer to switch operating systems and that was starting to become a pain! Slowly but steadily I tried out several aspects of the crazyflie ecosystem for development on Windows 10 and actually…. it is not so traumatic as it was almost 10 years ago.

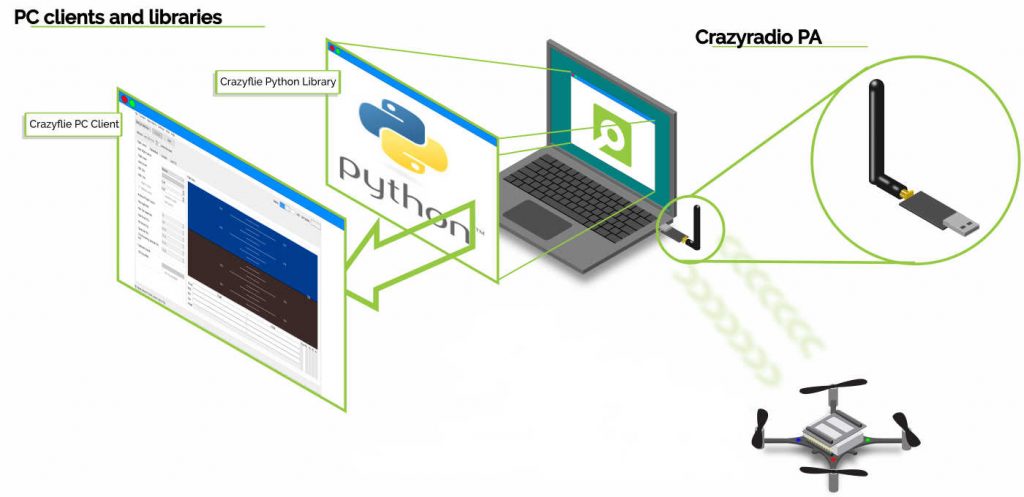
Python Library and Client

It went quite smooth when I first try to install python on windows again. Adding it to the PATH environment variable is still very important but luckily the new install manager provides that as an option. Moreover, Visual Studio Code also provides the possibility to switch between python environments so that you try different versions of python, but for now version 3.8 was plenty for me.

With the newest versions of the Windows install of Python, pip is by definition already installed, but I experienced that it would still be necessary to upgrade pip by typing the following in either a Command Prompt or (my favorite) Powershell:

python -m pip install --upgrade pip

After this, install the cflib from release was quite an ease (‘pip install cflib’) but even installing it from source with Git configured on Windows was no problem at all and very similar to a native Ubuntu install.

Until recently the cfclient was a bit more challenging to install through pip from due the SDL2 windows library had to be downloaded separately, so the only options would have been installing from source or the .exe application release. The later has not been updated since the 2020.09 release due to building errors. Luckily, with the latest release, this has now been fixed as a SLD2 python library was found. Now the cfclient can be installed with a simple ‘pip install cfclient’.

Firmware Building with WSL

The firmware development was the next thing that I tried to get up and running, which managed to be slightly trickier. About a year ago I tried to get Cygwin to work on Windows, but my bad memories of the past came back due to the clunkiness of it all and I abandoned it again. Also there are some reported issues with the out-of-tree build (aka the App layer). Some colleagues at Bitcraze already mentioned the Windows Subsystem for Linux (WSL) but I never really looked at it until the need came to move back to Windows for development. And I must say, I wish I had tried it out a while ago.

With some repositories downloaded already on my Windows system with Git, I installed Ubuntu 20.04 WSL, got the appropriate gcc libraries and accessed the crazyflie-firmware by ‘cd /mnt/c/my/repos‘. Building the firmware with ‘make all’ went pretty okay… although it took about a minute which is a little long compared to the 20 secs on the native Ubuntu install. The big problem was that I could not use Docker and the handy bitcraze toolbelt due to the WSL version still being 1. These functionalities were only available for version 2 so I went ahead and upgraded the WSL and linked it to docker desktop. But after upgrading, building the firmware from that same repository on the C:/ drive took insanely long (almost 10 minutes). So I switched back the WSL ubuntu 20.04 to version 1, installed a second WSL (this time Ubuntu 18.04), updated that one to WSL2 and used solely for docker and toolbelt purposes. Not ideal quite yet… but luckily with visual studio code it is very easy to switch the WSL .

But there is more though! Recently I timed how long it took to build the crazyflie-firmware with ‘make all -j8’ from both WSL version in a repository that is on the C:/ drive on Windows (accessible by /mnt/c from the WLS), or from a repository on the local file system:

  • WSL 2 (ubuntu 18.04)
    • C:/ = 11m06s
    • WSL local = 00m19s
  • WSL 1 (ubuntu 20.04)
    • C:/ = 01m04s
    • WSL local = 00m59s

This is done on an Windows laptop with an i7-6700HQ with 32 Gb RAM. The differences with WLS2 between build firmware on the windows file system or the local WSL file system is huge! So that means that the right way is to have WSL2 with the repo on the WSL file system, which is similar to build time as a native install of Ubuntu.

Flashing the Crazyflie

The main issue still with WSL is that it does not allow USB access… So even if the crazyradio driver is installed on windows with Zadig, you will not be able to see if you type ‘lsusb‘ in WSL for both version 1 and 2. So when I still had the repository on the C:/ drive and build the crazyflie-firmware from there I could flash the Crazyflie through the Cfclient or Cflib (with cfloader) through Powershell, but building it from the local subsystem, which is way faster for WSL2, would require to first copy the cf2.bin file to my C drive before doing that.

Another option, although still in Alpha phase, is to use the experimental Crazyradio server for WSL made by Arnaud, for which the user instructions can be found in an issue thread only for now. The important thing is that the Zadig installed driver has to be switched to WinUSB and switched back again to LibUSB if you want to use the Cfclient on windows. It would still needs some work to improve the user experience but gives promise of better integration of WSL development for the Crazyflie.

To Conclude

Soon I’m planning to soon reinstall the Windows part on the dual boot laptop but there are already some things that I will integrate on my freshly installed Windows based on what I experienced so far:

  • Keep using Python on windows and install the Cfclient and Cflib by pip only.
  • Only use Ubunu 20.04 as WSL2 and install the Crazyflie-firmware on the WSL local file system.
  • Use Visual Studio Code as the editor for both C:/ based and WSL based repos.
  • Use the Crazyradio server or copy the bin file to C:/ whenever I need to flash the crazyflie with development firmware.

For any AIdeck development, I would still need to use the native Ubuntu part or the bitcraze-VM since there is not a USB access or server yet for the programmer. However, if Windows would support USB devices and a graphical interface for WSL, that will make all our Windows-based Crazyflie development dreams come true!

We are happy to anounce the availability of the 2021.03 release of the Crazyflie firmware and client! This release includes new binaries for the Crazyflie (2021.03), the Crazyflie client 2021.03 as well as the Crazyflie python library 0.1.13.2. The firmware package can be downloaded from the Crazyflie release repository (2021.03) or can be flashed directly using the client bootloader window. The firmware package contains the STM firmware (2021.03), the NRF firmware (2021.03) and the Lighthouse deck FPGA binary (V6).

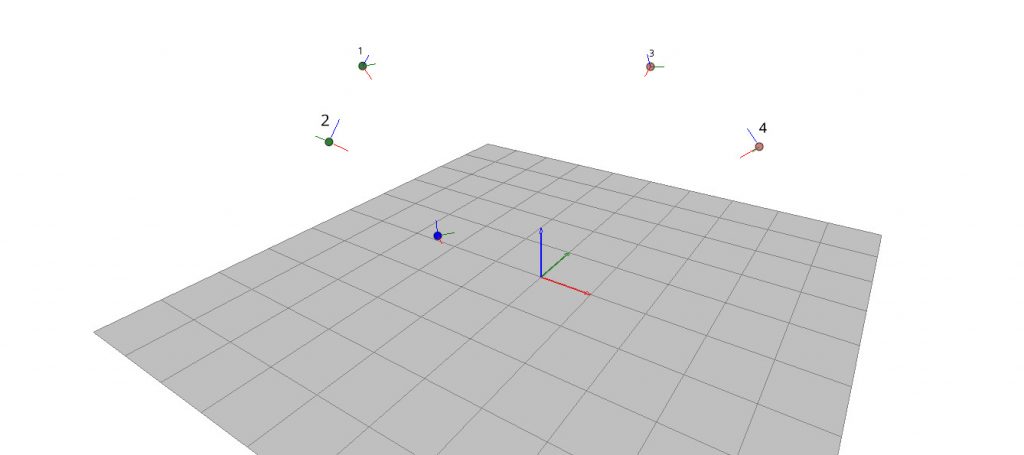
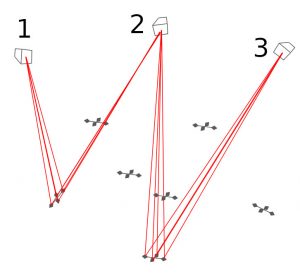
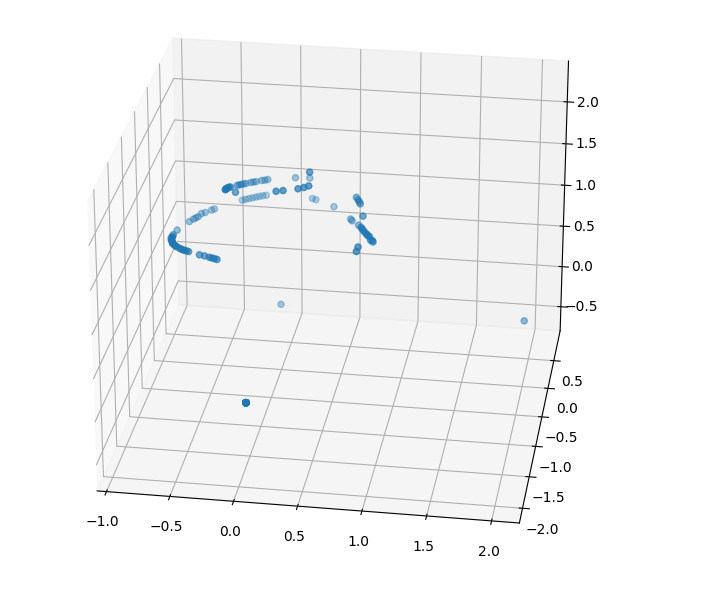
The main feature in this release is the stabilization of the Lighthouse positioning system. The main work done has been on the system setup and management, it has taken a lot of work spawning all the projects and a brunch of documentation, but we think we have reached a stage where the lighthouse positioning system is working very well and is very easy to setup and get working. We have now published the new Lighthouse getting started guide and will be working this week at updating all required materials to mark Lighthouse as released!

When the Lighthouse positioning system was released in early access, it required to install SteamVR, run some custom scripts and flash a modified firmware to get up and running. This has been improved slightly over time with scripts that allows to setup the system without using SteamVR and some way to store the required system data in the Crazyflie configuration memory rather than hard-coded in the firmware. With this release, everything is coming together and it is now possible to go from zero to an autonomous Crazyflie flying in a lighthouse system in minutes by just using the Crazyflie client.

Another major improvement made to support the lighthouse is the modification of the bootloader Crazyflie update sequence in the client as well as in command line. The new sequence will restart the Crazyflie a couple of times while upgrading the Crazyflie, this allows for an upgrade of the firmware in the installed decks if required. The lighthouse deck firmware has been added to the Crazyflie .zip release file and will be flashed into the deck while flashing the release to a Crazyflie that has the deck installed.

An alternative, robust TDoA implementation has been added for the Loco Positioning System. This change has been contributed by williamwenda on Github and can optionally be enabled at runtime.

An event subsystem has also been added to the firmware. It allows to log events onto the SD-Card which can be very useful when acquiring positioning data from the various positioning system supported by the Crazyflie. We have described this subsystem in an earlier blog post.

There has also been a lot of smaller improvement and bugfixes in this release. See the individual project releases not for more information.

We hope you are going to enjoy this new Crazyflie and lighthouse release. Do not hesitate to drop a comment here, questions on the forum if you have any or bug reports of github in the (very unlikely ;-) event that there are bugs left.

About a month ago we released the AIdeck 1.1, which has some slight upgrades and changes compared to the 1.0. Even though the AIdeck 1.1 is still in early access, we do see the number of support questions increase on our forum and in the issue list of the AIdeck example repo. Therefore we are planning to host an AI-deck getting-started workshop by the PULP lab on the 16th of April at 14:00 (Central European Summer time)!

PULP

The PULP lab has done many amazing research on the field of Edge ML and were one of the collaborators in the development of the AI-deck of which their work on the Pulp Shield was the main inspiration. For more information check out their guest blogpost and be sure to read their latest work on the AI-deck!

More over, they have been working on an opensource tools that also work on the GAP8chip which are must try-outs for any AI-deck users

All in all, since they clearly know what they are talking about, they are more than qualified to teach the rest of us how to work with all this! Also check out Luca Benini’s keynote at RISC-V or this week at the TinyML summit if you would like to learn more about PULP!

Date and content Workshop

The workshop will be tailored to those that have just started to to work with the AI-deck however, we think it will be interesting for regular users as well. Note that the tools mentioned above will not be handled this time.

These are the topics that will be discussed:

  • Hardware explanation (Gap8 specifics and AIdeck)
  • Software Preliminaries (GapSDK,, VM)
  • Hands-on examples

The workshop will take approximately 2 hours and will be on 16th of April in the afternoon, but the exact specifics will be given at a later date. So make sure to already block it in your calendar and to sign up for more information!

Sign up for more information

You can sign up to receive more information by giving your email address in this google form. We will also keep you up-to-date on our discord channel and the event page.

One crucial aspect of any research and development is to record and analyze data, which then can be used for quantifying performance, debugging strange behavior, or guide us in our decision making. We have been trying to improve the way that this is done to help all of you researcher out there with their work, so this blog post will explain an alternative, better, method to record whatever is happening on the Crazyflie in real-time.

Example data collection of received Lighthouse angles over time. The y-axis contains a unique measurement ID (16 in total for 4 sensors * 2 basestations * 2 sweeps/basestation). Thus, each dot represents the time when a certain kind of measurement was received. We do not receive all angles in fixed intervals, because of the interference between basestations.

Existing Logging Approaches

So far there have been two principle ways of recording data with the Crazyflie:

  1. Logging: In the firmware, one can define global variables that can be streamed out at a fixed frequency, using logging configurations. Variables have a name and data type, and the list of all available variables can be queried from the firmware.
  2. Debug Prints: It is possible to add DEBUG_PRINT(…) in any place that contains a string and possibly some variables. These are asynchronous, but not timestamped, so they are mostly useful to notify the user of some status change.

Both approaches have multiple backends. The logging variables can be streamed over USB, via the Crazyradio, or on a Micro-SD-card using a specialized deck. When using the radio or USB, the frequency is limited to 100 Hz and only a few variables can be streamed at this speed due to bandwidth limitations. The Micro-SD-card deck, on the other hand, allows to log a lot more logging variables at speeds up to 1 kHz, making it possible to access high-speed sensor information, e.g., the IMU data. The Debug Prints can be used over the radio or USB, or with a SEGGER J-Link and a Debug Adapter, over J-Link Real-Time Transfer (RTT). The former is very bandwidth limited, while the latter requires a physical wire connection, making it impossible to use while flying.

New Approach: Event-Based Logging

Event-based logging combines the advantages of the existing approaches and offers a third alternative to record data. Similar to debug prints, a user can trigger an event anywhere in the code and include some mandatory variables that describe this event (so-called payload). Similar to logging, these events are timestamped and have fewer bandwidth limitations. Currently, there is just one backend for the Micro-SD-card deck, but it would be possible to add support for radio and USB as well.

One of our first test cases of the event-based logging is to analyze the data we get from the Lighthouse deck. Here, we trigger an event whenever we received a raw sweep. This allows us to visually see the interference that happens between two LH2 basestations. We also use the event-based logging for time synchronization of the Crazyflie and a motion capture system: when we enable the IR LEDs on the active marker deck, we record an event that contains the Crazyflie timestamp. On the PC side, we record a PC timestamp when the motion capture system first detects the IR LEDs. Clock drifts can be computed by using the same logging mechanism when the IR LEDs are turned off.

Adding event-based logging had some other good side effects as well: the logging is now generally much faster, there is more user feedback about the correct buffer size usage, and the binary files are smaller. More details are in the documentation.

Future Work

We are working on adding event triggers to the state estimator. This will enable us to record all the sensor information during real flights with different positioning systems, so that we can tune and improve the Kalman state estimator. It will also be interesting to add support for events in CRTP, so that it can be used over USB and radio.

Communicating with your Crazyflie is an important pillar for its operation. As more robots are controlled, the reliability of this communication link becomes more and more important, as the probability that there is no failure at any of the Crazyflies decreases exponentially with the number of robots. We have written about the low-level radio link before. Today, we focus on past, on-going, and future improvements to make the communication more reliable.

Reliability Challenges

As part of doing research with the Crazyswarm, I noticed several issues:

  1. Sometimes commands do not seem to arrive at the Crazyflie, especially when using unicast (i.e., direct) communication with a specific Crazyflie.
  2. Sending ‘too much’ data while the Crazyflie is flying can cause catastrophic crashes. One example is trying to upload a trajectory, while flying in a motion capture space. However, this occasionally even happens if just trying to update a parameter.

The radio link has a feature called Safelink, which essentially guarantees that packets are send and received in order and no packet gets dropped. This feature never worked reliably in the crazyflie_cpp implementation and is therefore not used in the Crazyswarm. However, it is the default mode for cflib. The Crazy RealTime Protocol (CRTP) also has the notion of different communication ports in order to prioritize important messages such as control commands over less important ones such as trajectory upload. However, this prioritization was never implemented in any of the clients.

Native Link Implementations

Another, non reliability related, issue always was that the performance of cflib is not stellar when connected to many Crazyflies. This is mostly because (C)Python has a Global Interpreter Lock (GIL), which prevents true multi-threaded operation. A common solution to allow true parallelism is multiprocessing or implementations in a language that compiles to machine code (native code).

Crazyflie-link-Cpp

The first native implementation is written in C++ and includes Python bindings using pybind11. The overall API is simple: A connection can be created given a URI, and data can be send and received. Internally, this library implements Safelink to guarantee packets are in order, uses priority queues to prioritize messages on important CRTP ports, and handles all multi-radio and multi-thread related synchronization issues. Unlike prior implementations, the bandwidth is shared uniformly between all connections, i.e., there is no race between different Crazyflies communicating over the same radio. We measured a 50% lower CPU utilization when connecting with the CF client, a 20% higher bandwidth, and a 20% lower latency compared to the pure Python implementation.

For now, this feature is experimental and needs to be enabled using an environment variable. If you want to give it a try, you can use

pip install cflinkcpp
USE_CFLINK=cpp cfclient

once everything is merged to master in the next couple of days.

Crazyflie-link-rs

The second native implementation is written in Rust. As it turns out, writing multi-threaded code in C++ is very difficult and error-prone, because it is up to the user to use the various synchronization primitives correctly. Rust, on the other hand, provides extensive compile-time checks to increase reliability by design. This implementation does not have quite as many features as the C++ version yet and requires a bit more work to be used with the client but it is going to be worked-on on Fridays. The goal is to reach functional parity with the other link implementations and be able to use the rust-implemented link with “USE_CFLINK=rs cfclient” in the future.

Future Work

As part of the development process, we also wrote many system tests that verify correctness and measure performance of the various link implementations. We already found and fixed several firmware bugs (681 and 688). The major open issue is that there is no flow control on the system link (the connection between the NRF51 and the STM32), which still causes packet loss in some cases.

Hi!

Since the middle of January, Bitcraze has had two additional guests: us! We, Josefine & Max, are currently doing our master thesis at Bitcraze during our final semester at LTH.

Unfortunately, the pandemic means remote working which could have caused some difficulties with hardware and equipment accessibility. Fortunately, for us, our goal with the thesis is to emulate the Crazyflie 2.1 hardware in the open source software Renode. We can therefore do the work at home.

Since this is the first time either of us have tried to emulate hardware it is exciting to see if it will even be possible, especially as we do not know what limitations Renode might have. Thus far, four weeks in, there have been some hiccups and crashes but also progress and success. One example was when we got the USART up and running and it became possible to start printing debug messages and another was when the LED lights were connected and it was possible to see when they were turned on and off. 

Example of output from partially implemented hardware.

If all goes well, the emulated hardware could be used as a part of the CI pipeline to automatically hunt for bugs. Academically, it would be used to further study testing methods of control firmware.

Getting a glimpse into the workings at Bitcraze and the lovely people working here has been most interesting and we are looking forward to the time ahead. Until next time, hopefully with a working emulation, Josefine & Max.

The lithium polymer battery we use, as with basically all rechargeable batteries, suffers from degradation. That means that when using it, and as time goes by, its energy capacity as well as performance will degrade. The performance, which is very related to the batteries internal resistance, will result in that the Crazyflie will not be able to produce the same maximum thrust and it will not be able to carry as much payload. The loss of capacity is due to ageing and charge cycles, results in that the flight time will decrease. A common solution to monitor the degradation is to have a BMS, or Battery Management System, that constantly monitors the battery health. For the small type of battery that is used in the Crazyflie, this is not yet viable, but maybe there is something we can do to test part of the battery health anyway?

Theory

Since the internal resistance will result in a larger voltage drop during load we can exploit this property and measure it. We will however not only measure the batteries internal resistance but the resistance of the complete power path as a result of the components we have at hand on the Crazyflie.

Power path block diagram

So what we do is to activate the switch (mosfet) so the load (motor) will pull power from the battery. The power drawn will result in a voltage drop compared to a no-load situation, which we can measure and compare to a healthy setup. Since the measurement point is at the PCB traces, any of the components before that point can be causing the voltage drop, however the battery and connector are most likely of doing so as they are most prone to ageing.

Implementation

The load is achieved by, for a very short time, activate the motors at full thrust. We don’t want the Crazyflie to fly away as that would be a bit unhandy. Before activating the motors we measure the idle voltage and during load we measure the minimum voltage so we can calculate the voltage drop. This is pretty easy to do, the problem is to find a good level where we can distinguish a good battery from bad battery. Therefore this feature is pretty experimental. We tested many batteries and good batteries tend to yield a voltage drop between 0.60V – 0.85V while bad batteries go above 1.0V. Therefore the current threshold is set to 0.95V but it would be good to have more data so if you use this feature please give us feedback if the level is wrong. The testing was run on a “stock” setup with the standard battery, propeller and motors, and it is for these the level is set. A different setup will probably not work well and needs a different threshold. Also keep in mind that the connector can also be a “bad” guy as oxide can build up and result in a higher resistance. Often this can be solved with some e.g. WD-40 solvent or un-connecting/connecting the connector several times.

Usage

This is not in the 2021.01 release so one would have to run the latest on the master branch on both the crazyflie-firmware and the Crazyfie-clients-python. The simplest way to test this feature is to launch the cflient, connect to the Crazyflie, open the console tab and press the battery test button.

cfclient console tab after running battery test

When pressing the button the propellers will shortly spin and there will be an output in the console as highlighted in red. If the sag value is below 0.95V it will yield [OK] and if it is above it will say [FAIL].

A probably more useful use case is to test this automatically before taking of with e.g. a swarm. This can be done by setting the parameter health.startBatTest to 1 and after around 0.5s readout the result in the log variable health.batteryPass to check that it is set to 1. The health.batterySag log variable will contain the latest sag (voltage drop) measurement. Hopefully this experimental feature will be a good way of increasing reliability of flights.

We’re happy to announce the availability of the 2021.01 release! The release includes the Crazyflie firmware (2021.01), the python library (0.1.13.1) and the python client (2021.1). The firmware package can be downloaded from the Crazyflie release repository (2021.01) or can be flashed directly using the client bootloader window.

Most of the improvements have been done in the Crazyflie firmware and include:

The App API in the Crazyflie firmware has been extended and improved to be able to handle a wider range of applications. The goal is to enable a majority of users to implement the functionality they need in an app instead of hacking into the firmware it self.

We have improved the Lighthouse support in the firmware and both V1 and V2 are now working well. Even-though everything is not finished yet, we have taken a good step towards official Lighthouse positioning.

A collision avoidance module has kindly been contributed by the Crazyswarm team.

A persistant storage module has been added to enable data to be persisted and available after the Crazyflie is power cycled. It will initially be used to store Lighthouse system information, but will be useful for many other tasks in the future.

Basic arming functionality has been added for platforms using brushless motors.

In the client the LPS tab now has a 3D visualization of the positioning system and a new tab has been added to show the python log output.

Unfortunately we have run into some problems for the Windows client build which is not available for this release.

Finally we have fixed bugs and worked to improve the general stability.

We hope you enjoy it!

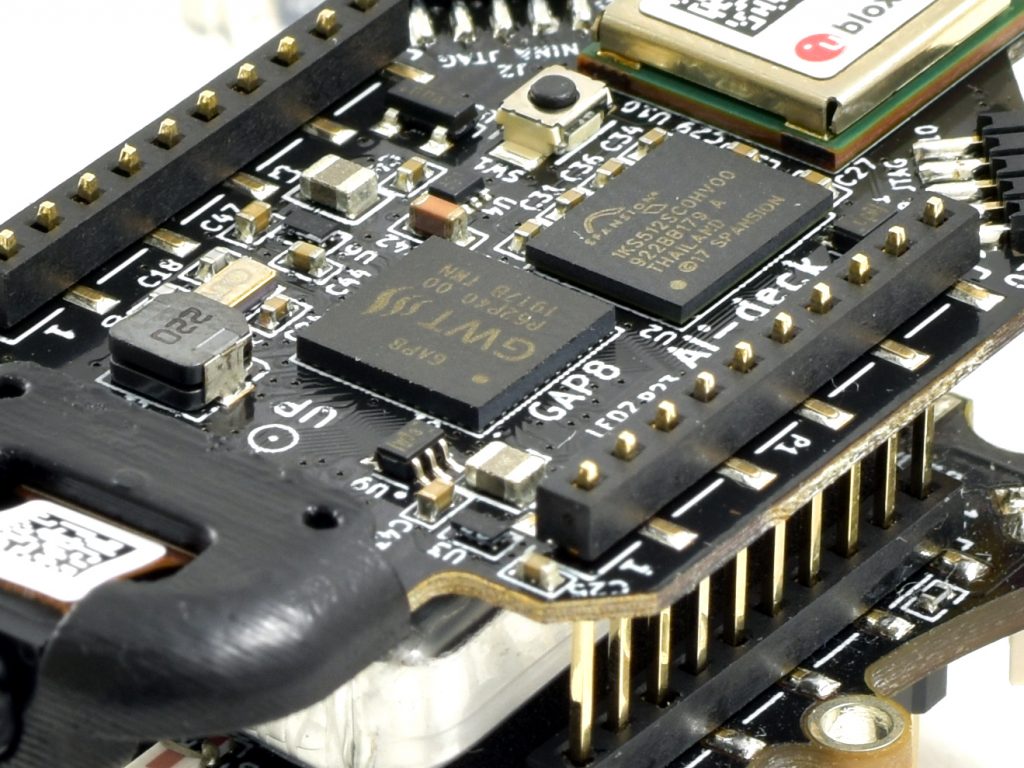
It has been a while since we have done an update on the AI-deck! However, as announced in the New Year post, we do have some important changes coming up for the next batch of production. These changes include updated version of the GAP8 chip and switching to a gray-scale camera. We will call this version the AI-deck 1.1, but its firmware should be compatible with the previous version. Currently we don’t have a clear time-line of when we will receive the next batch but it will be soon.

Newer version of GAP8

Together with our collaborators at Greenwaves technologies, we decided to update the GAP8 chip to the latest version available. Since this required a microchip change on the product and to prevent any confusion, we decided to call this version the AIdeck 1.1.

The new version of the GAP8 chip includes several improvements, which resolves 1. conflict problem between uart and hyperbus and 2. Cluster DMA when doing the data transfer between L2 and L1 Memory. The last issue is considered a corner case will only occur if the AI-deck 1.0 is pushed to its limit with a large deep neural network. Although we expect that both issues will not affect the current users if you are experiencing any related problems with the previous version (AI-deck 1.0), please send us an email to contact@bitcraze.io.

Gray-scale Camera

In July we have given an update where we discussed the color camera and how to process it on the GAP8 chip. Even though at the first we were pretty optimistic on the possibilities with the camera, after discussing with the community, ETH zurich and Greenwaves T., we have decided to switch back to a gray-scale camera.

This is because most examples in the gap_sdk repo mostly assume a gray-scale camera. And even though the color camera would be good for image processing with anything of color, it is less ideal for neural networks on edge machine learning devices.

For those who committed themselves to the color camera module, do not worry! We are planning to still offer the color camera module as a separate product in our store! Also we will have a limited amount of grayscale cameras available for those who are unhappy with their AI-decks 1.0’s color camera.

Firmware, Docs and Examples

Since the AI-deck is still in early release, have all the code and documentation in this github repository. This contains all the start-up guides and keeps track of all the bugs and fixes. Some months ago, we managed to update all of this to the latest GAP SDK (3.8.1), which fixed the streamer issues we are having.

However, the quickest way on how to improve this Early Release product is to get feedback by its users. So if you are having any problems at all, do not hesitate to ask a question on to forum or to open up a issue in the repository!

Storage is one of these very simple functionality that actually ends up being quite hard to implement properly. It is also one of these functionality that is never acutely needed, it is possible to hack around it, so it gets pushed to be implemented later. Later is now, we have now implemented a generic persistent storage subsystem in the Crazyflie.

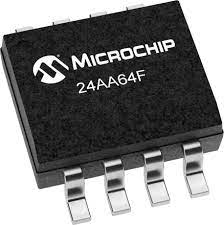
In Crazyflie 1.0, we originally stored settings in a setting block in flash and required the bootloader to change the settings. When designing Crazyflie 2.0 we added an I2C EEPROM to make it easier to store settings, though until now we only stored a fix config block very similar to the one stored in the Crazyflie 1 and that only contained basic radio settings and tuning. This implementation is hard to evolve since the data structure is fixed in one point of the code.

What is now implemented is a generic key-buffer database stored in the I2C EEPROM. From the API user point of view, it is now possible to store, retrieve and delete a buffer using a string as a key. This allows any subsystem, or apps, in the Crazyflie to easily store and retrieve their own config blocks. There is 7KB of space available for storage in the EEPROM.

The first user of this new storage subsystem is the Lighthouse driver. The storage is used to store lighthouse basestation geometries and calibration data, this allows to configure a Crazyflie for a system/lab and have it running out of the box even after a restart.

A future use-case would be to implement stored-parameters: we have been thinking about implementing optional persistence for the parameters for a long time. This would allow to modify and then store new default values for any parameters already present in the Crazyflie. This would allow to very easily implement things like custom controller tuning in a quad made from a bolt for example.

At low level, we where hopping to be able to find a ready-to-use library or file system to store data in our small EEPROM, but unfortunately we did not find anything that would fit our needs. We then had to implement our own storage format.

The low level structure is documented in the Crazyflie firmware repos. Basically the data are stored as a table of “length-key-value” entries with a possibility for an entry to he a “hole”. When new buffers are added they are added at the end of the table and when they are deleted they are replaced by a hole. When the end of the table is reached, the table is de-fragmented by removing the holes and moving the data as much as possible to the beginning of the memory. This structure works very well for an EEPROM and could even be adapted to work well on FLASH.

New CI

When we started activating continuous integration/automatic build to our GitHub repos we did so using Travis CI for firmware builds and AppVeyor for windows builds. However, the GitHub CI offering, GitHub actions, has become quite complete lately and now supports Linux, Windows as well as MacOS builds.

We have now transitioned to GitHub actions for all our repos and we will also implement most of the release process using GitHub actions as well. This will hopefully streamline the release process and allow us to release new version of our projects more often.