Programming the Crazyflie
In this tutorial we show the steps needed to change the software running in the Crazyflie, often called firmware. We will show how to modify the source code , how to build it and finally download and flash it to your Crazyflie. These are the necessary steps to write your own code and change the behaviour of your Crazyflie.
We assume that you have basic knowledge of the C-programming language.
preparations
For this tutorial you need:
- A Crazyflie
- A Crazyradio 2.0 or Crazyradio PA
- A computer with an IDE installed. In this tutorial we will use Visual Studio Code.
- Compile dependencies installed. In this tutorial we will compile the
crazyflie-firmwarerepository. For more information on how to install the dependencies, see the repository documentation. Compiling different projects may require different dependencies.
set-up
For details on how to set-up the cfclient and the Crazyradio see Getting started with the Crazyflie 2.x.
get source code
In this tutorial we will use the Crazyflie firmware repository. The repository contains the source code that runs on the STM32 microcontroller in the Crazyflie. All public repositories are available on GitHub. Clone the relevant repository to your computer. For example:
$ git clone https://github.com/bitcraze/crazyflie-firmware.git
Modify the source code
We will start out by modifying the source code. The update of the code is minimalistic, we will change the color of the front right LED from red to green.
start an editor
Open your IDE of choice. In this tutorial we use Visual Studio Code.
open the file
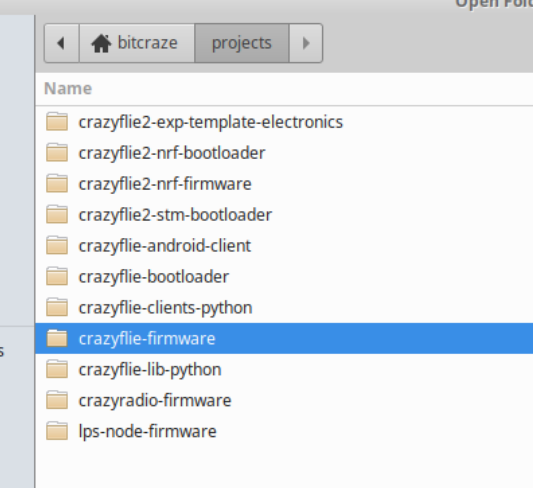
Use the File menu to select “Open Folder…” and navigate to the cloned “crazyflie-firmware” folder and open it.

Navigate to or search (CTRL + p) for src/drivers/interface/led.h and click to open it.
change the code
Find the line
#define SYS_LED LED_RED_R
and change it to
#define SYS_LED LED_GREEN_R
save
Save the file through the File menu or by pressing CTRL + S
Build the source code
Now it’s time to build the source code into binary files that can be downloaded to the Crazyflie.
For more, and more detailed, information about developing the Crazyflie firmware you can go to the repository documentation here.
start the build
If there is no command line terminal at the bottom of the vscode window you can use
the Terminal menu and select “New Terminal” to get access to a bash terminal window.
The build system for the Crazyflie firmware is based on make.
First navigate to the rootfolder of the crazyflie-firmware repository. Then you will need to create an default configuration file for the firmware:
$ make cf2_defconfig
$ make cf21bl_defconfig
$ make bolt_defconfig
If you want to build firmware for a different platform, please checkout the build instructions of the crazyflie-firmware.
Then you can start a build by issuing the following command in the terminal window in Visual Studio Code:
$ make
To speed up the build process, utilize all available processing units with:
$ make -j$(nproc)
You should see something like the below on a successful build:
$ make
  CLEAN_VERSION
  CC    sensors_mpu9250_lps25h.o
  CC    sensors_bmi088_bmp388.o
  CC    main.o
  CC    nvic.o
  CC    led.o
  CC    usblink.o
  CC    ledseq.o
  CC    freeRTOSdebug.o
  CC    pm_stm32f4.o
  CC    radiolink.o
  CC    system.o
  CC    usddeck.o
  CC    cfassert.o
  VTMPL version.c
  CC    version.o
  LD    cf2.elf
  COPY  cf2.hex
  COPY  cf2.bin
  DFUse cf2.dfu
Build for the CF2 platform!
Build 11:0864ef92245a (2021.03 +11) MODIFIED
Version extracted from git
Crazyloader build!
Flash |  242184/1032192 (23%),  790008 free | text: 236372, data: 5812, ccmdata: 0
RAM   |   71128/131072  (54%),   59944 free | bss: 65316, data: 5812
CCM   |   58380/65536   (89%),    7156 free | ccmbss: 58380, ccmdata: 0
Flash the Crazyflie
Now we have the binary files and it is time to download them to the Crazyflie and save them in the flash memory, often called flashing. Our new modified version of the firmware will replace what ever version you currently have installed. If you want to go back to the official firmware just re-flash the Crazyflie with an official release.
prepare the Crazyflie
Turn your Crazyflie 2.x off.
Start it in bootloader mode by pressing and holding the power button for 3 seconds. Both blue LEDs will blink.
flashing
In the terminal window type:
$ make cload
Printouts in the “Console” window shows the progress and the LEDs on the Crazyflie flicker.
$ make cload
python3 -m cfloader  flash  cf2.bin stm32-fw
Restart the Crazyflie you want to bootload in the next
 10 seconds ...
 done!
Connected to bootloader on the Crazyflie (version=0x10)
Target info: nrf51 (0xFE)
Flash pages: 232 | Page size: 1024 | Buffer pages: 1 | Start page: 88
144 KBytes of flash available for firmware image.
Target info: stm32 (0xFF)
Flash pages: 1024 | Page size: 1024 | Buffer pages: 10 | Start page: 16
1008 KBytes of flash available for firmware image.
Flashing 1 of 1 to stm32 (fw): 242639 bytes (237 pages) ..........10..........10..........10..........10..........10..........10..........10..........10..........10..........10..........10..........10..........10..........10..........10..........10..........10..........10..........10..........10..........10..........10..........10.......7
Reset in firmware mode ...
That's it!
The Crazyfile should restart when the flashing is complete and the front right LED of your Crazyflie should now be green instead of the normal red.
Congratulations to your first Crazyflie hack!
Next steps
Debugging using GDB
For a guide on debugging the Crazyflie firmware using GDB, see the firmware documentation here.
Alternatives to the VM
In this tutorial we used the VM, mainly because it is the easiest way to get started. However there two other ways to compile the code; installing the toolchain on your machine or using the Toolbelt. All solutions have their pros and cons but it is probably worth looking into all options if you plan to do some serious development.